.svg)


Can we develop 50% faster by connecting Copilot to MCP servers like the one from KendoUI?
Of course, it will depend on your work and how good your process is. In some specific roles, using AI might be a negative 50%. If the stars align with the right kind of work and the right process, I actually think its possible to reliably increase productivity by 2x-3x. I can’t change what kind of work you do, but today I’m going to try my best to improve your process with Kendo’s MCP server and spec-driven development.
Scenario
We work for Eggbert’s Automaton Outlet, an online retailer of upgrades for mechanical lifeforms.
The engineering team recently used Progress Agentic RAG to create an AI chat tool trained on all of our internal data. Now we need to build the chatbot's UI.
We already use KendoReact for our UI, so naturally, this new design will too. Kendo offers an MCP tool to enhance VS Code Copilot with deeper knowledge of Kendo components, so we will be using that tool as well.
Getting started with Kendo MCP
What does it do?
Model Context Protocol (MCP) is an industry standard for connecting our AI models to real-world data and tools. AI models are trained on public data and can’t necessarily differentiate between good and bad sources. Public AI models also don’t have access to your private databases, documentation, or internal tools. MCP exists to bridge the gap.
In the case of using AI to develop a website with KendoUI, an unconnected AI model might build based on a 10-year-old blog post written by a junior dev. By connecting to the Kendo MCP server, your AI model is fed the latest docs, examples, and best practices right from the source.
License requirement
Licensing for this setup costs roughly $1,400/yr and includes the full Kendo component library with technical support, which makes up about half that cost. Even ignoring the value of a professional component library with a support team, that’s still less than $120/mo for increased productivity. Even at offshore rates, we only need to save you a day of work a month to make it worth it. (As of Feb 2026, prices will change eventually)
Installation
VS Code & Copilot
First, you’ll need to install VS Code and the Copilot Chat extension. This is also possible with other editors, but you’ll need to figure those out on your own.

Kendo MCP
You’ll need to download your Telerik license file. You could store it with your project, but that can get messy with version control, and you probably need it for other projects as well. If you store it in your home folder, this setup becomes copy/paste for each new project.
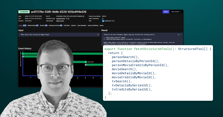
Next, add Kendo to your MCP file in VS Code (other editors are similar, check the docs)
{
  "servers": {
    "kendo-react-assistant": {
      "type": "stdio",
      "command": "npx",
      "args": ["-y", "@progress/kendo-react-mcp@latest"],
      "env": {
        "TELERIK_LICENSE_PATH": "~/Telerik/telerik-license.txt"
      }
    }
  }
}
Click [Start] above the server name to activate it
Figma MCP
You can do this with screenshots or really descriptive prompts, but if your design team uses Figma, they also have an MCP server that connects your AI coding tool directly to the design.
If you are running the desktop Figma app, you can run the MCP server from that app. Otherwise, you can use the remote/cloud version.
"figma-desktop": {
  "type": "http",
  "url": "http://127.0.0.1:3845/mcp"
}
OR
"figma": {
  "url": "https://mcp.figma.com/mcp",
  "type": "http"
}
Once you’ve added one of the MCP servers, you will have to hit the [Start] option to activate this server as well.
Bonus: Playwright
Playwright is a browser automation tool. By connecting to Playwright’s MCP server, your AI can take screenshots to better see what it’s building. The Claude docs note that giving your AI better validation tools will result in better final outputs.
Finished mcp.json file
Only add one version of the Figma server and remember to click [Start] on each MCP server you want to use.
Keep in mind that each MCP server running increases the context for your AI chat instance. You can overwhelm your context with too much information, which will cause it to answer slower and cost more, so run your Kendo assistant when you are doing UI work, but not when building out your backend server.

Getting your AI to work consistently
The best way to achieve consistency in your AI-generated code is by leveraging instructions, teaching skills, and tweaking prompts. Note: Other AI editors have different versions of this, so check back in 6 months and maybe we’ll have an industry standard. For now, this is the GitHub Copilot answer.
Instructions .github/instructions are guidelines for your project, e.g. use React, structure folders in a particular way, and hit 80% test coverage with Testing Library. Instructions are scoped to their folder so you can have unique instructions for an older section of your app or create different instructions for backend versus frontend code.
Skills .github/skills are specialized abilities and/or context that can be loaded as needed. Your AI will only pull in a skill as needed, keeping your context smaller with lower token use. If something in your instructions file is not applicable to the majority of your requests, it might be better as a skill.
Prompts .github/prompts are pre-written requests; think of them as macros or shortcuts. A prompt file should be a generic request for Copilot that applies to the file you have open. Use prompt files for frequently repeated actions in your repo.
Instructions
For this repo, we will use our instructions file to set a baseline for our development. A bit like an ESlint file for AI, we will spell out guidelines for our AI to follow.
AI models sometimes ‘forget’ they have MCP connections and will ignore them for some tasks. Its a good idea to point out the MCP server in multiple places, including the instructions file.
When developing in this project, follow these guidelines:

Use KendoReact for UI components.
You have access to the KendoReact MCP server to view docs, examples, and best practices.
Skills
Skills are like instructions, but for things your AI doesn’t need to know for every prompt. Skills provide more specific instructions for accomplishing tasks. Your AI chat has a context window, all it is aware of in that instance. If you put too much in the context window, your AI will slow down and cost more to run.
Put general coding guidelines in your instructions, but place specific, how-to details into individual skill files.
Creating React components

Use KendoReact when applicable. When using KendoReact,
check the KendoReact MCP server for documentation, examples, and best practices.

Here is an example of how to write a React component:
...
Prompts
You are going to make many of the same requests to Copilot, over and over. We can create a prompt folder with premade prompts to make our lives easier. We can even commit this prompt folder, giving the whole team access to these same prompts. Our team can collectively add to and improve our prompts over time.
Copilot will look for prompts at .github/prompts. Prompt files should be markdown files named *.prompt.md. Once the file is created, it's like a shortcut or macro that feeds the agent the text it contains. To access make-something.prompt.md, open a Copilot chat window and type /make-something

Your prompt files can specify which AI model to use. I’ve found that Claude Sonnet 4.5 is the best at writing code, but Claude Haiku is 80% as good for 1/3 the token cost. For easier requests, like writing tests, I can save a few tokens by setting my testing prompt to use Haiku. Experiment with giving the same prompt to a few different models and see what you think. The answer to “which is the best model?” might be different by the time you get to the bottom of the page.
We have a repo of some of our favorite prompts. Prompts should be customized for your project and evolve over time.
Behold, the spec document
A good spec document is the linchpin of enhancing your productivity with AI coding agents. I think of AI as a talented but wildly inexperienced junior dev. If you give a junior dev a ticket that is either low on details or broad in scope, you get the result you deserve. As developers, our roles must shift as we grow into this new era. To become an AI-enhanced dev, you must first become an AI-enhanced product owner.
The AI-enhanced workflow goes something like this:
-
[DEV] Write a description of the work you want done.
-
[AI-1] Agent enhances that spec and asks questions for clarity.
-
[DEV] Reviews the document. Answers questions. Provides clarity or corrections where needed.
-
[AI-1] Updates the spec according to dev feedback.
-
[DEV] Review. Repeat previous steps as needed.
-
[AI-2] Clear context and have a fresh review of the spec document.
-
[DEV] Review. Repeat previous steps as needed.
-
[AI-3] Implement
-
[DEV] Review. Repeat previous steps as needed.
Note that there are several dev check-ins along the way. Like a junior dev, AI models aim to please and won’t tell you when you’ve asked too much, so it's up to you to keep the process on track. Especially when you first start, it’s tempting to create overly ambitious spec documents. Pay attention to where your agent is struggling and look for opportunities to break your task down into multiple parts. Its ok to delete everything and start over with 2 or 3 specs instead of 1 massive document.
In the above example, why are there 3 different AIs? We’ll get there in a few minutes.
Writing our spec document
Start by creating a spec markdown file. I suggest putting all your docs in a /specs folder at the root of your project and using the ticket name as the filename, like /specs/JIRA-123.spec.md
Create a page for the AI chat window. Connect to Figma to see the design linked ....

The page should live within the standard layout at url "/chat"
Components should be built with KendoReact
Once you have written a descriptive and concise accounting of the work you expect, it is time to let an AI agent enhance your spec document. Using the prompts I’ve shared, I am going to start the AI enhancement process by ensuring my spec document is in context, selecting the right AI model, and then running /bit-spec.

After a while, Copilot will update the document and add questions as needed. Once complete, you can click [Keep] to accept those changes. Next, review the document. If something is wrong, you can tell Copilot to fix it. Answer the questions and run /bit-spec-answered-questions to move on. Repeat until no questions remain. It's common for this step to take 2 or 3 iterations.
Now for some fresh eyes, figuratively speaking. Close the current Copilot chat window. Your AI agents build up context as they process. Mistakes and misunderstandings can multiply over time. By closing the chat window and opening a new one, the context gets flushed. The new chat has no idea what happened in the previous chat. With this fresh agent, get a review of the spec document by running /bit-spec-review. The result will likely leave you with more questions to clarify what exactly you want built. Again, you might have to repeat this step 2 or 3 times.
Done? You’ve put in a lot of work to get this far, but you now have a spec document that puts to shame any Jira ticket you've ever received.
Spec Tips
Keep your spec small and focused. You wouldn’t have a junior dev rewrite a large section of your app in a single pass, so don’t expect great results when asking AI to do the same. Break the work down before creating a spec. It's even okay to use AI to break down the work in a larger planning document.
Review, review, review. With better inputs, you get better outputs. Review the spec document you created. Keeping the scope tight will make your review easier.
Think like a product owner. Specs are like really detailed Jira tickets. You are the product owner now. Act accordingly.
Code Connect (maybe)
Designers create reusable components in Figma, and developers mirror those components in the code. Figma’s “Code Connect” spec links the two component versions together for your AI assistant, so it uses the correct component instead of generating its own. If you’ve created a bunch of custom UI components that mirror the ones your designer has built in Figma, look into linking them up with Code Connect.
That said, even without Code Connect, I have gotten great results with the Kendo MCP server when the Figma design uses Kendo components.
Implementation
The first time you used Copilot, you probably skipped straight to this step. I know I did.
Once again, let’s refresh our context by closing the current chat and opening a new one. Now we can run /bit-spec-implement and see how accurate our spec document is. If we’ve done our job of focusing our request and providing sufficient detail, we should get a good result.
Note that our prompt specifies using the Kendo MCP server so that while implementing our design, Copilot will use the Kendo MCP connection to populate the AI context with the best, most accurate information possible. The various AI model companies are crawling the internet for information, so any agent will have found Kendo docs and blogs, and therefore will be able to build using Kendo. What makes adding the Kendo MCP server special is its accuracy and specificity. The Kendo MCP server can offer a guiding hand currated by the makers of Kendo.
Note that if your spec includes “Phases”, the chat window will keep track of them while it works.

How did it go?
Did you get the result you expected?
Remember that AI is non-deterministic. If you run the same prompt again, you’ll get a different result. At any step in the process, if you don’t like the result, you can delete it and run it again. Try changing the context or the AI model to find what gives you the best results.
The Next Level
Notice how these prompts take a little while to run? I find it very hard to stay focused on a task that I’m not doing. It’s really hard not to end up on Reddit or Candy Crush as my brain seeks out something more interesting.
And here is where productivity can go up or down. Instead of pulling out your phone, what if you opened a second clone of this repo in another VS Code window?
cp -r <project-name> <project-name-v2>By having multiple copies of the project, you can open multiple instances your editor, each with its own AI chat running. This allows you to tackle multiple tasks in parallel. You become a manager of a team of junior devs. My mind starts to break after 3, but maybe you are better than me.
Conclusion
If you skipped straight to implementation the first time you used Copilot, you’re not alone. I did too.
The difference between “this is amazing” and “this is a waste of time” usually comes down to how much structure you put around it. MCP gives your AI better information. Instructions, skills, and prompts keep it consistent. A tight spec document keeps it focused. Clearing context between phases prevents mistakes from compounding.
The 50% productivity boost from Copilot and KendoUI's MCP server comes from reducing ambiguity, shortening feedback loops, and giving your AI access to the same authoritative sources you would use yourself. When the work is scoped correctly and the system is well set up, that kind of gain is realistic. Sometimes it’s even higher.
AI is non-deterministic, but your workflow shouldn’t be. If you treat your coding agent like a talented but inexperienced junior dev, give it clear requirements, review its work, and break problems into manageable pieces, you stop experimenting and start building faster on purpose.
Further reading
GitHub has a toolset called Spec Kit that automates some of what we did. It is a bit more advanced, though sometimes a bit cumbersome.
Copilot now lets you create custom agents with their own configurations. You could create a UI-specific agent with the Kendo MCP server, and another agent for backend work, connecting to Apollo’s MCP server for GraphQL.