.svg)


.png)
In this tutorial, we will migrate a CanJS app to CanJS 3 using can-migrate, a CLI codebase refactoring tool that automates a large portion of the work required to upgrade a 2.x codebase to CanJS 3.
Before getting started, I recommend reviewing the migration guide to understand what changes are required for CanJS 3, as well as the recommended migration process steps to learn about the process we’ll follow in this tutorial.
You can also watch this YouTube video to follow along with what’s in this tutorial:
Get Started
We will use the CanJS chat repo in this tutorial. You can clone it and follow along or use your own CanJS 2 project.
In this section, we will prepare for the migration by installing can-migrate, creating a migration branch in git, and ensuring all the tests are passing.
Install, Branch, and Test
First, install the can-migrate CLI globally:
npm install -g can-migrate
Create a branch in the repo for the migration and make sure the tests pass:
git checkout -b migration
npm test
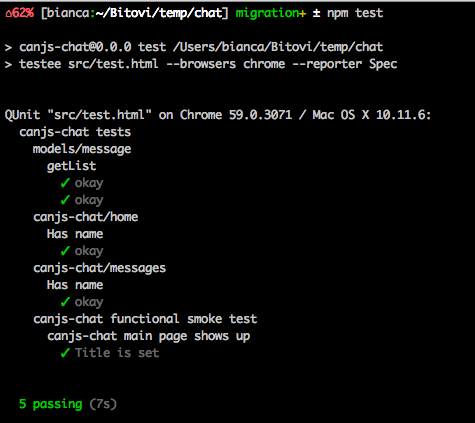
Now that all the tests passing on the migration branch, in the next section let’s run can-migrate on some of the tested JavaScript files.
Migration Process
In the chat codebase, we have the main.js file as well as three testable folders: src/home, src/message, and src/models. For each of these, we need to do the following:
- Run
can-migrateon each directory and themain.jsfile - Install the necessary
can-packages added to the code bycan-migrate - Remove global imports of the
canlibrary - Re-run the tests
- Fix issues if the tests aren’t passing
Run can-migrate
Run can-migrate on your first directory by passing the directory and the --apply flag to the CLI:
can-migrate src/models/ --apply
can-migrate works by running transform scripts that parse source code in order to do a code-aware find-and-replace refactor across multiple files. The command above will run all of the transforms on all the JavaScript files in the src/models/ directory. You know it is working when you see it running like this:
What changed?
After we let can-migrate do its magic, let’s investigate what changed. First, let’s take a look at the diff:
.png?width=576&height=527&name=pasted%20image%200%20(1).png)
Here are the transform scripts that made changes and what they did:
- can-list/replace.js
- Added import statement:
import CanList from "can-list" - Updated references of
can.ListtoCanList
- Added import statement:
- can-map/replace.js
- Added import statement:
import CanMap from "can-map" - Updated references of
can.MaptoCanMap
- Added import statement:
- can-map-define/import.js
- Updated import statement from nested path
"can/map/define/define"to"can-map-define"
- Updated import statement from nested path
Learn more about what each transform does in the Complete List of Transform Scripts.
Install the can-* packages
As we saw above, can-migrate added import statements for three new packages to the top of the model/message.js file: can-list, can-map, and can-map-define. In the next step, we will install these packages and make sure they are saved in our package.json.
Use npm to install the modules that were imported by can-migrate:
npm install can-list can-map can-map-define --save
.png?width=720&height=126&name=pasted%20image%200%20(2).png)
Remove the can global dependency
You may have noticed that in the diff above that we are importing the can- modules but we did not remove the global can import: import can from "can";. In this step, delete that line.
.png?width=720&height=209&name=pasted%20image%200%20(3).png)
Re-run Tests
Next, re-run your tests to see if there are any issues that need to be fixed:
npm test
.png?width=691&height=561&name=pasted%20image%200%20(4).png)
Luckily for us, all the tests are passing without any need to manual intervention.
Repeat
Now we’ll repeat the migration process on the rest of our modlets and JavaScript files, install the new packages, remove the can package, ensure the tests are still passing, and manually refactor if needed.
Home Modlet Migration
After running:
can-migrate src/home/ --apply
It made the following changes, as highlighted in this diff:
.png?width=527&height=482&name=pasted%20image%200%20(5).png)
We installed can-map and can-map-define in a previous step, so all we need to install is the can-component package. After that, we’ll re-run the tests to make sure they’re all still passing:
npm install can-component --save
npm test
Messages Modlet Migration
After running:
can-migrate src/messages/ --apply
It made the following changes, as highlighted in this diff:
.png?width=596&height=548&name=pasted%20image%200%20(6).png)
Since we are using object assignment destructuring on the second to last line, we are going to get an error because we import our messages.stache template as template, but the component is expecting the variable to be named view.
.png?width=549&height=213&name=pasted%20image%200%20(7).png)
After changing that, our tests will pass!
npm test
.png?width=503&height=414&name=pasted%20image%200%20(8).png)
Main.js Migration
After running:
can-migrate src/main.js --apply
It made the following changes, as highlighted in this diff:
.png?width=542&height=581&name=pasted%20image%200%20(9).png)
It added an import statement for the can-route package, so we need to install it. Don't forget to test it before moving on to the next section:
npm install can-route --save
Next, we need to remove the last use of the can module in this file. Right now, can.$ is used to access jQuery; in the next section, we’ll talk about what this is and how we can migrate that code.
can.$
Previous versions of CanJS shipped with your DOM manipulation library of choice. jQuery was the most popular library used and it was made available to your app via can.$.
CanJS 3 does not depend on any external library. In our app, we can migrate from can.$ to standalone $ with the following steps:
- Import jQuery at the top of the file:
import $ from ‘jQuery’ - Change
can.$to just$:- Before:
can.$("body").append(template(appState)); - After:
$("body").append(template(appState));
- Before:
- Remove the global
canimport
See the example diff below for the main.js file:
.png?width=611&height=374&name=pasted%20image%200%20(11).png)
Re-run Tests
Last, we’ll re-run the tests to make sure everything is passing:
npm test
All the tests are passing! We’re almost done with the entire upgrade.
.png?width=470&height=450&name=pasted%20image%200%20(10).png)
Remove can 2.3 from project
If you haven’t already, remove all the global can imports and the global can dependency from your package.json file:
npm uninstall can --save
In the chat application, we had to manually remove the global import from src/models/message.js and src/main.js. The npm uninstall command above removed can from the package.json. Don’t forget to re-run your tests one last time to ensure everything is still in working order.
.png?width=611&height=662&name=pasted%20image%200%20(12).png)
Fix issues that arise from removing can 2.3
After uninstalling can, we found an error coming from stealJS:
.png?width=720&height=112&name=pasted%20image%200%20(16).png)
This error is because we use both steal and stache in this project so in CanJS 3, we need to install steal-stache.
npm install steal-stache@3 --save
Next, we found another error because we were using an old version of bit-tabs, which we need to upgrade as well:
.png?width=720&height=96&name=pasted%20image%200%20(17).png)
npm install bit-tabs@latest --save
With that, the tests pass and our migration is complete! Congratulations!
Upgrade today
You can look at the detailed diff across versions to get an overview of the changes to the chat codebase after running can-migrate on each modlet and JavaScript file.
The Using Codemods guide has all the information you’ll need to use can-migrate to upgrade your app to CanJS 3. You can also find more details about all the steps required in the migration guide.
If you have an issue with using can-migrate, please create an issue on GitHub. You can also contribute back to the project by looking at the open issues and commenting on any you’d like to help fix.
If you have any questions about migrating, please post in our forums or Gitter chat and we’ll be happy to help!

Next Post