
Icons are used in applications, websites, marketing materials, you name it. They communicate complex topics, create visual interest, punctuate topics, and draw user focus. One of the easiest things to do to ensure that icons are used correctly across applications is to create and share an icon typeface. These icons can then be added to documents on a computer as a font, or used in your stylesheet to display the icons online or in an application.
Creating Your Icons
The first step is to create your icons. I prefer to start by sketching on paper and pencil to flesh out ideas. Once you have your concept(s), open your favorite vector design program. If this is a single icon or avatar, your Artboard size doesn’t really matter, but remember vector is infinitely scalable, so you just need to hit the size that isn’t too small and isn’t too big.
I have created example files for these icons if you would like to download and follow along:
Demo files: IconSketch File | Icon Illustrator File
If you are creating a set of icons that are meant to have similarity and work together, it is important that all of your Artboards are the same size. For a uniform icon set:
- Use a square Artboard
- Consider designing your icons based on a grid so they have a similarity (this is the grid I used in the demo)
- Find a stroke size that works at small and large sizes
- If your icon is going to be single-color, set it to solid black in your design program. This can be modified in app, or in stylesheet to the appropriate color
- Outline strokes and text
- Additional Best Practices for Working with SVGs
Demo files: Raw SVGs
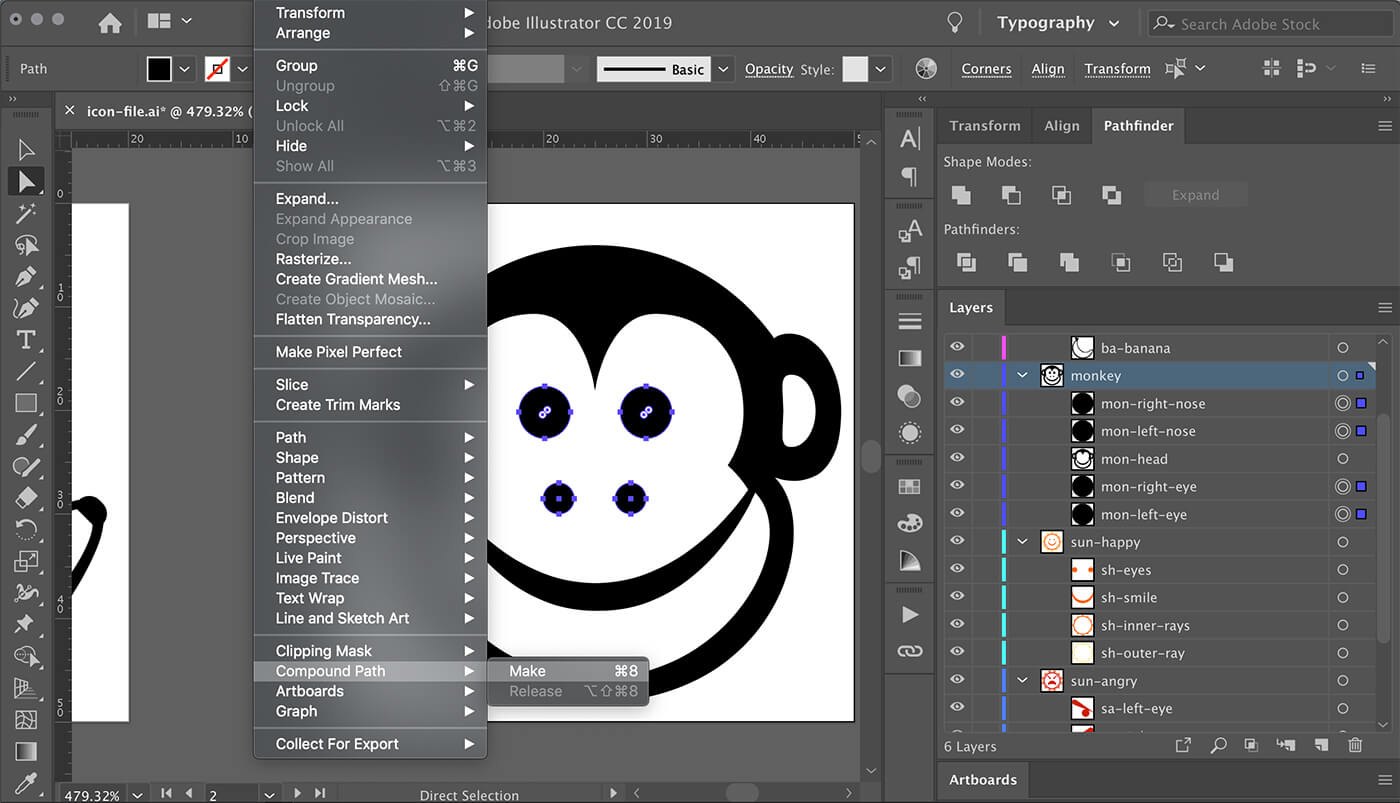
If you have grouped layers, circles, or ellipses you should convert them to compound paths. This will simplify your SVGs, gaining both smaller file sizes and ensuring that they display correctly across multiple platforms.
TIP: There is more detail on these items and more in my Best Practices for Working with SVGs post.
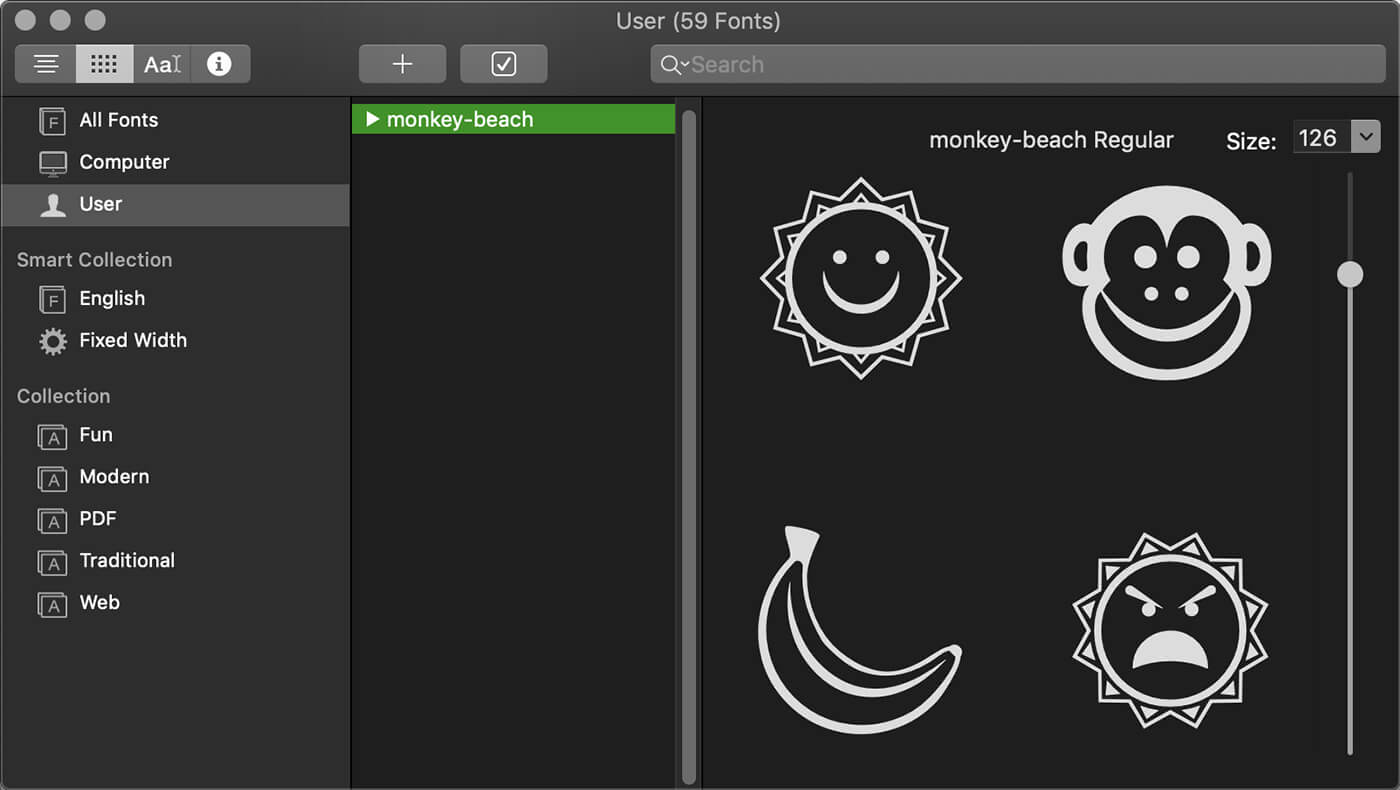
In the demo file you can see the similarity between the arc of the line on the banana, the monkey’s smile, and the smile and frown of the suns. The similarity is also carried over with the placement of design assets where they cross the grid, and also where the bezier curve handles hit. The sun icons have been included to demonstrate what happens with multi-color icons when creating an SVG icon.
Creating Your Icon Typeface
Add ID Tags
Once your icons are complete, export and optimize your icons as SVG format. After you have optimized your SVGs, open the files in a code editor and add a unique ID tag to each SVG tag.

Demo files: Optimized SVGs
Choosing a Generator
Creating a typeface is much easier than it might sound and doesn’t require expensive font building programs. There are lots of free online font generator options to choose from. These are the two I regularly use with clients: fontello.com | icomoon.io Both generators offer the same basic service; choose icons from existing sets or upload your own, and generate your icon typeface as the standard system fonts that are also used on the web. Both have their own shortcomings, which I will discuss below; it is because of these shortcomings that we use one generator or the other depending on the needs of the project.
Importing Your Icons
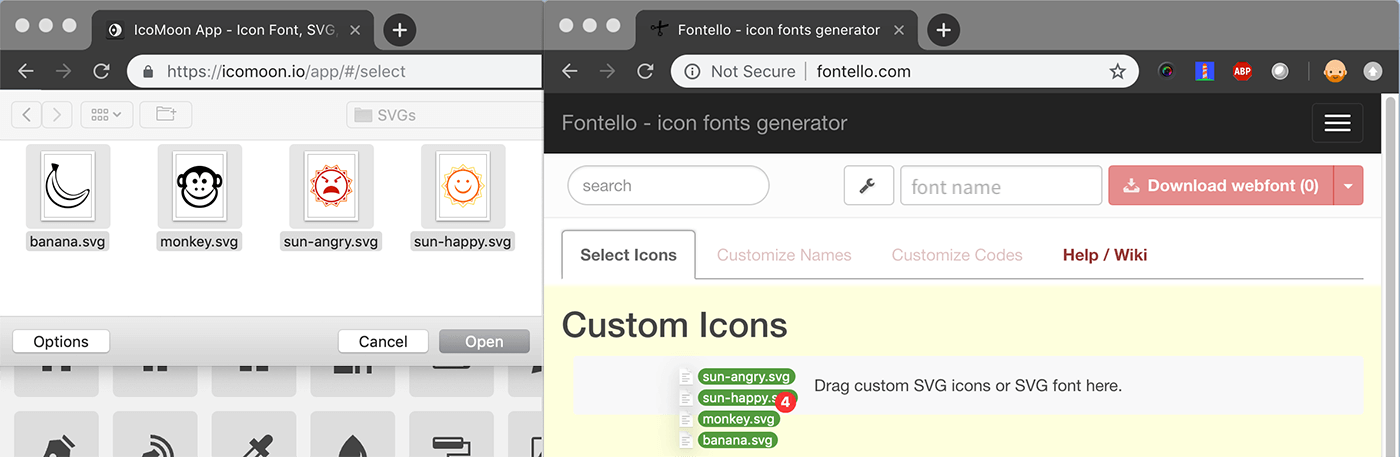
Once you have chosen your online font generator, you are going to want to import your SVG icons to the generator. Some require creating and naming a new project, others jump right in to uploading your icons.
TIP: There are some shortcomings (discussed in this article) of each that I demo here, so make sure you know your design requirements before making a typeface generator choice.
Make sure your icon set looks good at small, medium, and large sizes using the generators preview options – some generators display larger sizes than other. If something doesn’t look right, go back to your editing application and make adjustments to your icon, export, optimize, and replace the SVG in the font generator. You will notice in the image below, Fontello stripped the color of our multi-color icons. This is a shortcoming of using Fontello; I have an issue out for this, hopefully it will be resolved soon.
TIP: If your artboards are all the same size, your icons are aligned on the artboard correctly, this will reduce any issues with icons not looking as intended in the font generator.
Setting Up Your Download
Once your icon set looks good, you are almost ready to download your typeface. Each generator does this a little differently. Make sure to name your typeface and add a class prefix if needed. This is also when you can change the Unicode hex code.
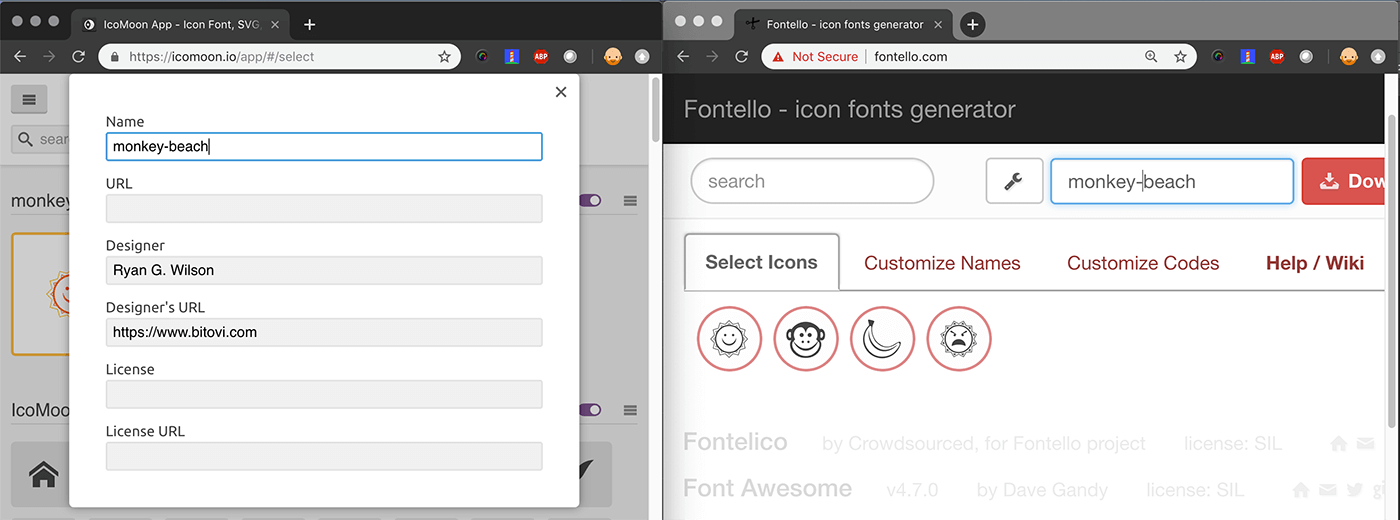
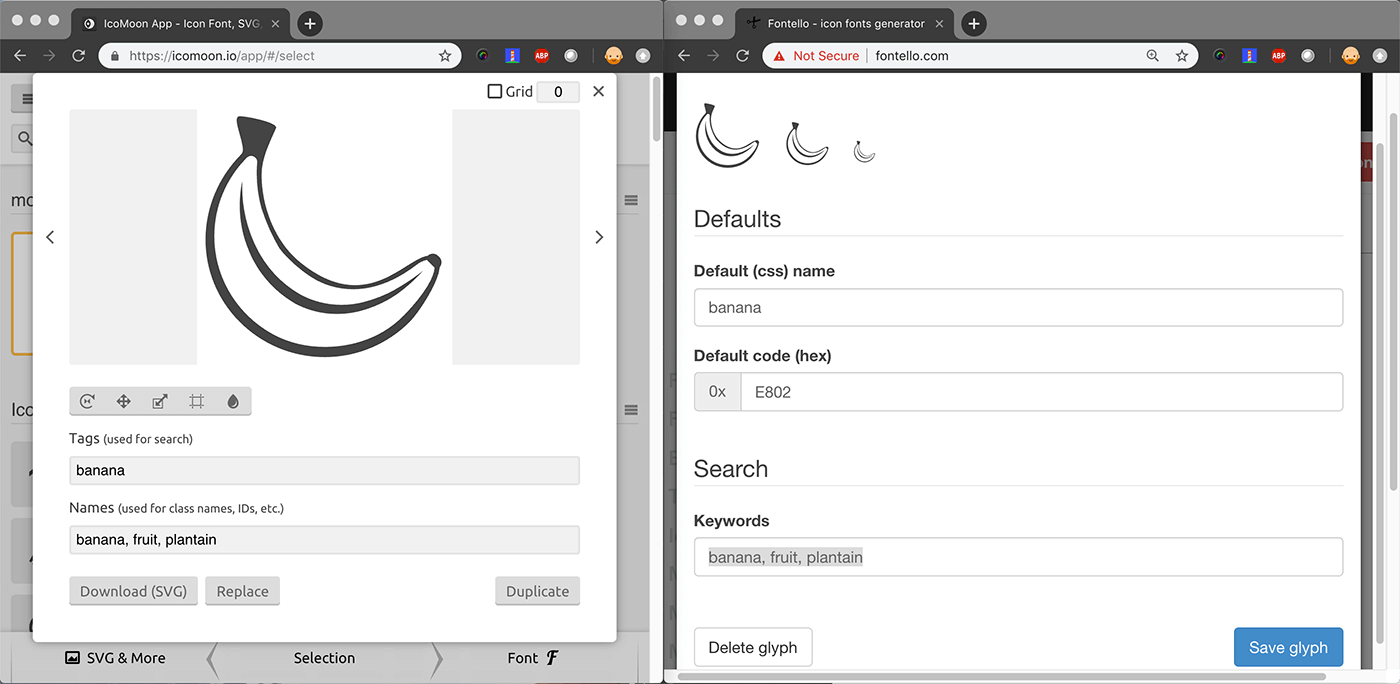
Tip: Adding keywords to each of the icons in your set will help you and others find icons easier, especially if you have a large icon set. Be descriptive. You can separate names with a comma, like `banana, fruit, plantain`.
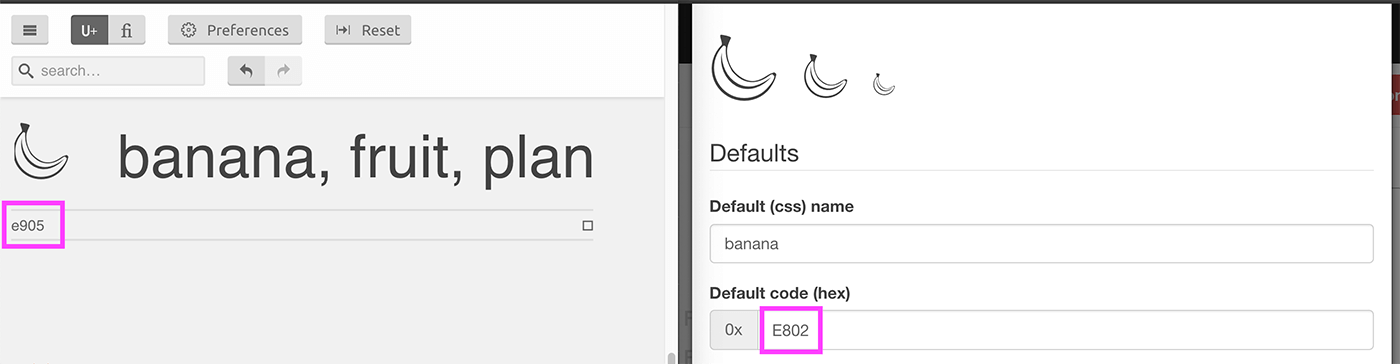
Tip: Unless you are replacing an existing icon typeface, don't worry about changing your Unicode Hex values.
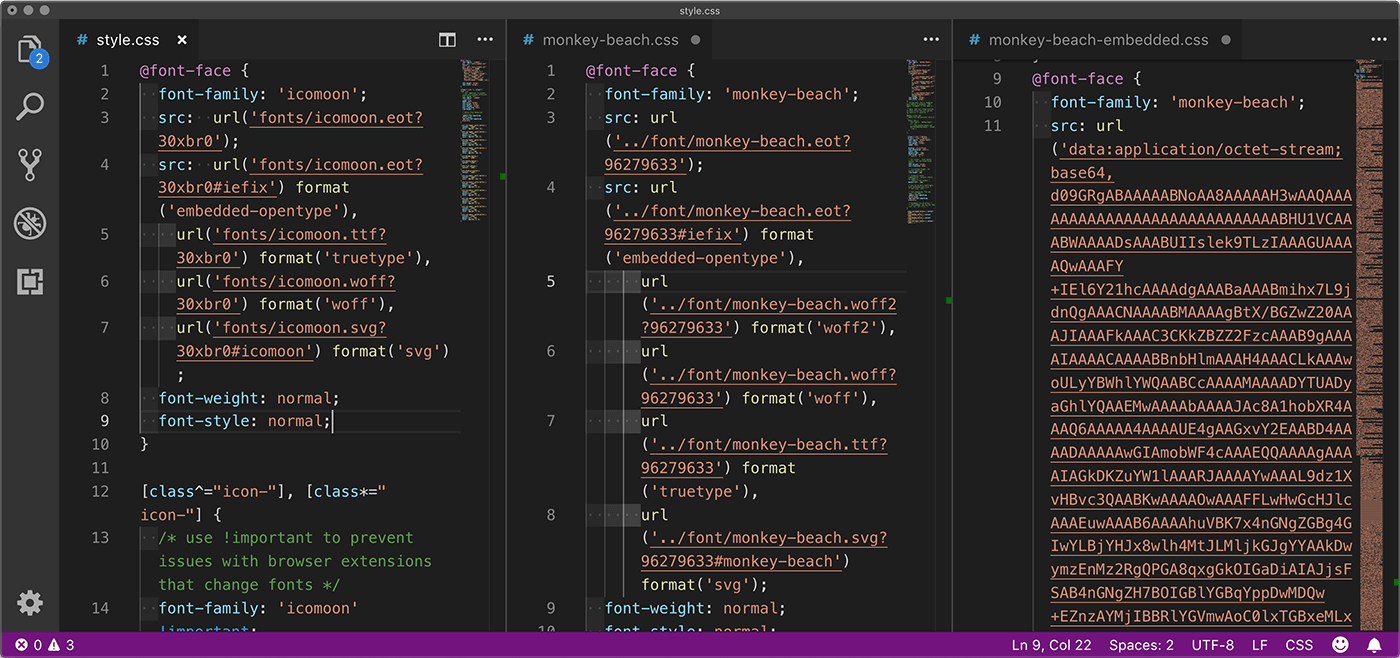
Encoding and embedding is automatic in Fontello. There is an option to encode and embed your font in CSS in Icomoon, but that is only included with a premium account. This is a shortcoming of Icomoon. Encoding your typeface will output a DataURL for your typeface giving you the option to BASE64 embed your typeface. You will want to generate at least .ttf, .eot, .woff, .woff2, and .eot font files if not also BASE64 encoding.

Tip: Embedding a DataURL in your @font-face rule is a trade off – you reduce DOM requests, but add more data to your stylesheet. If your stylesheet file that contains the BASE64 DataURL changes a lot, you pay that data cost more.
Downloading Your Icon Typeface
Download and open the stylesheet file (most likely named `styles.css` or the name you gave to your typeface .css) , copy and paste the @font-face declaration, icon declarations, and font smoothing into your project CSS and move any associated typeface files (.ttf, .eot, .woff, .woff2, and .eot) to the appropriate folder. It depends what what typeface files you reference on how backwards facing you want your browser support to be. CSS-Tricks has a great article on that if you are interested: CSS-Tricks – Using @font-face
Tip: Retain a copy of the .json file included in your download. You can use this file to quickly re-create your icon typeface in the font generator you originally used to create the typeface. Also, keep the SVG files for the individual icons as a backup in case you need to modify an icon later.
Using your Icon Typeface
Now you can reference the class for your icon within your markup based on the classes created by the generator:
<i class="icon-monkey"></i> -or- <span class="icon-monkey"></span>
Tip: Semantically, there is a difference between the `<i>` tag and the `<span>` tag. Technically, in HTML, `<i>` stands for ‘italic’, but many font generators and icon sets like fontawesome.com use it as a shorthand for ‘icon’, but you might have that tag defined differently, so it is better (and best practice) to use `<span>`.
Demo files: IcoMoon Generated Typeface | Fontello Generated Typeface
Installing Locally & Sharing Your Typeface
This step is optional, but helpful if you are creating mockups and prototypes for your design – Install the .ttffile on your computer to use your new icon typeface in any application, even word processing applications. This font file can be shared with other people in your company to do the same as well.
Tip: When testing your website, it is best to disable this typeface on your computer so you can test if your icon typeface is loading correctly as anyone without the typeface installed would see it. If you can’t see it, the client can’t either: check the path to your icon typeface files, or if using in a online prototyping application like Axure or Sketch, you will need to embed the typeface within that program.
Closing
Creating an icon typeface is a simple and easy solution for using and sharing your product or company icon set. If you are interested in learning more about the sketching process, please check out my article Finding Ideas Through Sketching. If you are interested in learning more about creating optimized SVGs please check out my article Best Practices for Working with SVGs.