.svg)


Have you ever felt the need to put some React code on a site that isn't React? Enter React to Web Component, a free library from Bitovi that makes it easy to put a React application inside of a web component. Anywhere you can insert a <script /> tag, you can use a web component.
There are many ways to set up React apps, but Create React App (CRA) is one of the most popular methods. Let's look at how to go from CRA to a web component, and then add it to a platform like HubSpot, Wordpress, or Shopify.
The instructions for other platforms like WordPress and Shopify should be identical until the last part.
This is a React to Web Component how-to using Create React App. We recommend Vite for new projects. Check out the Vite tutorial.
1. Create Your Application
Let's assume you've done this before and just need the commands to drop in your terminal.
For a Javascript project:
npx create-react-app <your-app-name>For a Typescript project (what I used):
npx create-react-app <your-app-name> --template typescriptYou can then install @r2wc/react-to-web-component and any other libraries you need.
npm i @r2wc/react-to-web-component - Passing in checklist items as an attribute shows how to map attributes to props
- MUI is used to demonstrate pulling in 3rd party libraries
- Typescript is used to show you can, but you can use JavaScript if you prefer
You can see the code here.
2. Edit Your Index Files
You won't need any configuration magic to get a web component out of CRA; only some changes to /public/index.html and /src/index.(js|tsx).
import r2wc from '@r2wc/react-to-web-component';
import Checklist from './components/checklist/Checklist';

const wcChecklist = r2wc(Checklist, { props: { items: "json" } });

customElements.define("r2w-checklist", wcChecklist);
In /src/index.html all you need to do is replace that now unused <div id="root"></div> with the checklist web component like so <r2w-checklist items='[{"label":"First Thing","isChecked":false}]' /> CRA should now be displaying your web component at http://localhost:3000 with live updates as you code. If you made a checklist just like me, it should look something like this:
It works! Wait, how did you get that into HubSpot?
3. Add Your Web Component to a CMS
Yes, that is the actual React code wrapped in a web component and added to HubSpot. Let's look at how.
First, you need to build your application and deploy it to a publicly accessible host. I'm going to use GitHub Pages because it's quick, reliable, and free. Plus, I'm keeping the code repo there: https://github.com/rjspencer/r2wc-checklist.
Create a GitHub repo and push your code. Then, install the GitHub Pages tool:
npm install gh-pages --save-devSet the "homepage" value in your package.json to the name of your repo. This will tell Create React App that your build will be in a subfolder so links can be created properly. Also, add these 'predeploy' and 'deploy' scripts:
"homepage": "/r2wc-checklist/",
"scripts": {
  "start": "react-scripts start",
  "build": "react-scripts build",
  "test": "react-scripts test",
  "eject": "react-scripts eject",
  "predeploy": "npm run build",
  "deploy": "gh-pages -d build"
},
You can now deploy with npm run deploy, so do it already!
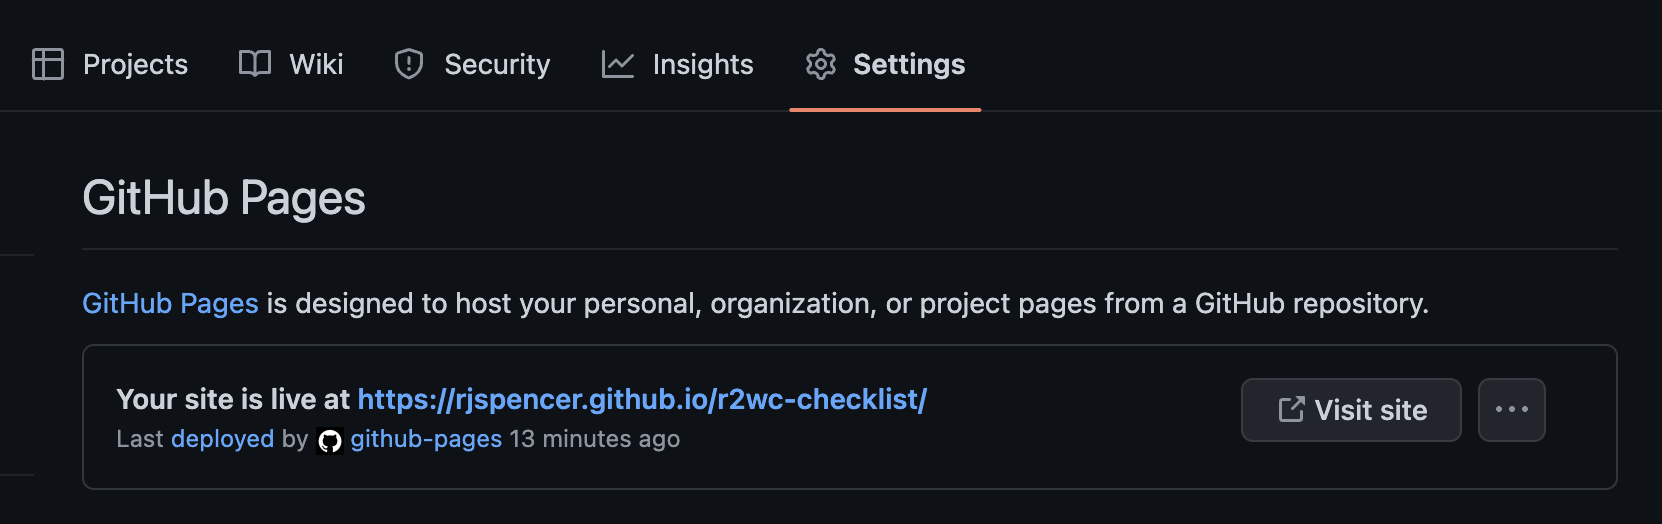
Once deployed, you can find your publicly accessible URL in Settings > Pages.
Web Component Deployed, Now What?
With your web component loose on the internet, you're ready to add it to your CMS.
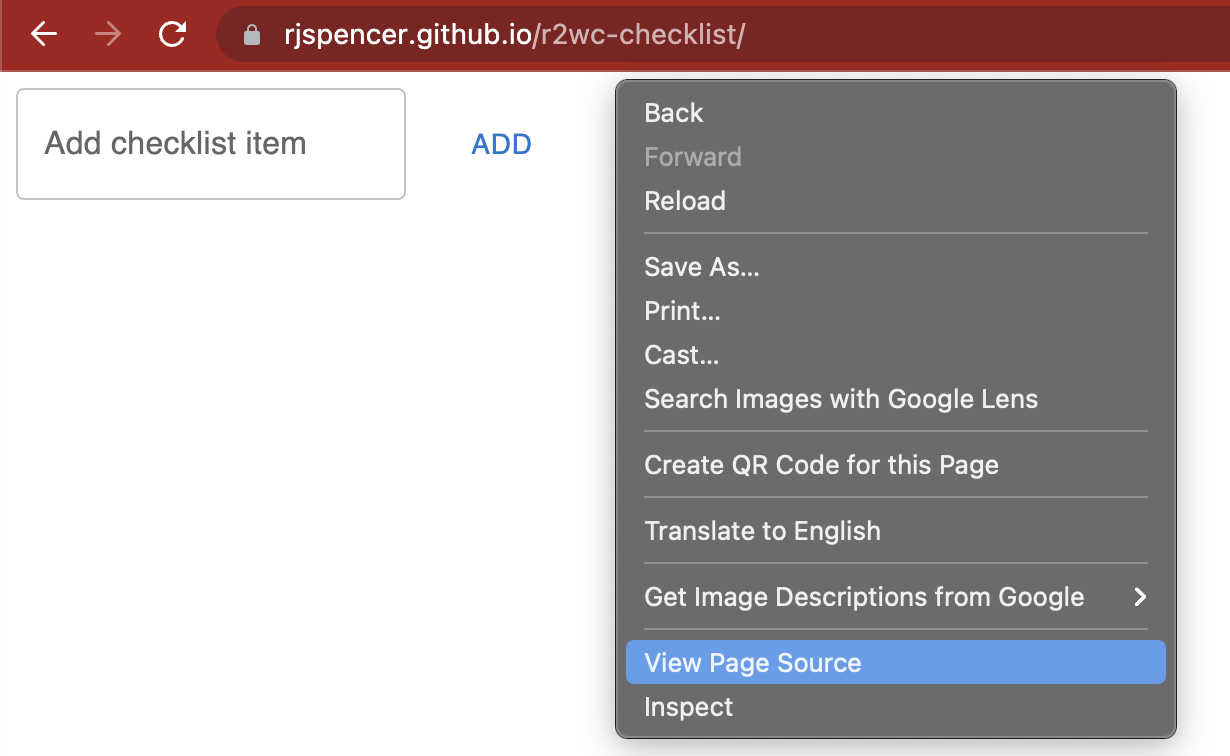
First, you need to find the script tag that loads your deployed code. You'll add that along with your web component tag to your HubSpot or whichever other site you want. To find the script tag, open up your deploy GitHub Pages link and "View Source". The tag should look like
<script defer="defer" src="/r2wc-checklist/static/js/main.c07c87fe.js"></script>
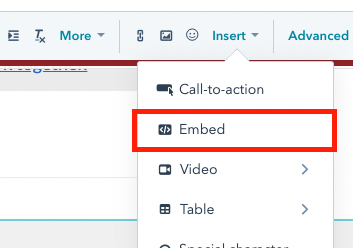
In the page edit menu, click Insert > Embed.
This is where HubSpot, WordPress, Shopify, etc. will differ. Whichever system you are using, you need to either find an "Embed" section or paste the script and web component tags directly into your content.
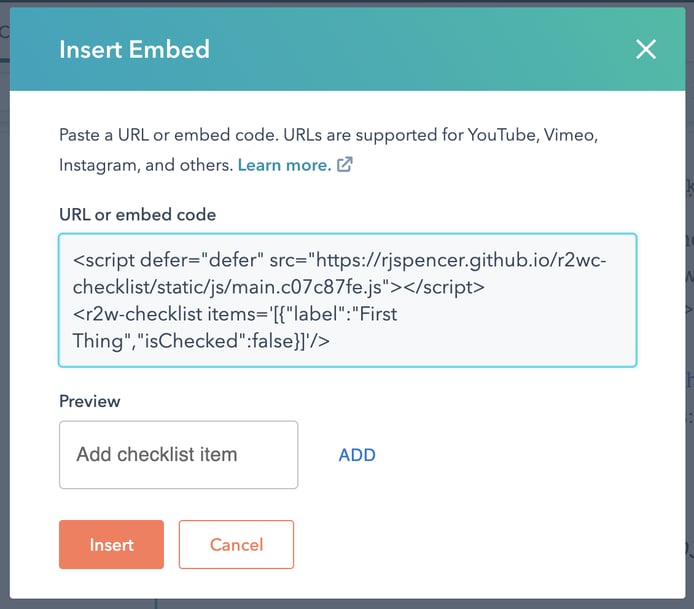
Add your script and web component tags and a preview should appear. Click [Insert].
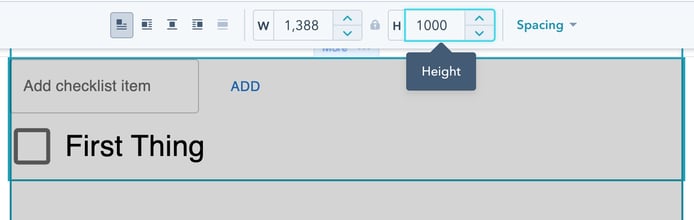
Once your web component is embedded, you can click on it to see and adjust the size settings. If you have a component that grows dynamically, like this list, then you probably want to give it a large height value.
That's it. Your component is now in your HubSpot page. Using the same script and web component tags, you should be able to inject your web component-wrapped React app in blogs, ecommerce sites, Angular apps and anywhere else that JavaScript runs!
4. Future-Proof Your Component
But wait! My component breaks when I deploy a new version! Let's future-proof it.
The problem is, CRA adds a fresh hash value into the file name on each build. CRA injects the new file name into the index.html file. This ensures that the browser ditches the cache and uses new code whenever the version changes because main.<version1>.js is not the same as main.<version2>.js.
It's a feature, not a bug. But it's a feature that doesn't quite work for us. We need to create a stable main.js file, without a hash, that contains our new version.
Create a file called predeploy.sh at the root of your project. In this shell script, you're going to use a wildcard to find your main JavaScript file and rename it without the hash. Rename it to just main.js, ensuring you always have a stable filename to point to for our embeds.
# predeploy.sh

# remove the version hash from our base javascript file for a stable URL
find build/static/js -name "main.*.js" -exec mv '{}' build/static/js/main.js \;
First, the script looks in the build directory for a file that matches the pattern main.<wildcard>.js and then passes the relative path to the move mv command. In this case, the mv command is essentially a rename command because you're going to move it within the same directory.
The first argument of mv is the original file path which is now in the variable '{}'. Technically, the brackets contain all the files found, but we know its just going to be one. Yeah, it's weird, just trust me. The second argument is the new file path you want: build/static.main.js. Since this will run on every deploy, you'll always be able to access your widget at https://<username>.github.io/<repo-name>/static/js.main.js.
Once you've created the above shell script file, add it to the predeploy script in package.json, which always runs first when you do npm run deploy. You want the app code build to happen first and complete, so you use && and then add your rename script.
"predeploy": "npm run build && sh predeploy.sh",
Now go update your embed code with the non-hashed URL.
5. Styling Your Component
There's something off with the styling... Good catch. With web components, you have to choose between the light or the shadow.
With the light DOM, your component is open to the rest of the page for both JavaScript and CSS. Globally defined styles will apply to the inner workings of your component. That is what is happening on this checklist—the input looks off because a CSS definition in the CMS theme is resizing it in a way that conflicts with MUI.
The light side is causing a problem in this particular use because it uses an opinionated design framework. If it had used plain HTML instead, it would be a flexible web component that could be embedded into any site and would pick up the surrounding style automatically. While that's a really cool feature, it's not right for this particular instance.
To solve this, let's use the shadow DOM. By activating the shadow DOM, the CSS and JavaScript of the component is shut off from the rest of the page. The components will act a bit like they are in an iframe, separated from the page.
To turn on shadow DOM, add the shadow: "open" option in index.tsx.
const wcChecklistShadow = reactToWebComponent(WebComponentWrapper, { shadow: "open" });
Conclusion
Create React App (CRA) was chosen for this post because it's beginner-friendly and lots of existing projects use it. After reading this, you should be able to take a project you already have and turn it into a web component! However, for new projects we believe there are better build options available today, such as Vite.
Stay tuned for our next @r2wc/react-to-web-component post where we will be working with a production-ready Vite build.
If you wanna play around with @r2wc/react-to-web-component some more, head on over to our CodeSandbox example!
Have a problem?
Bitovi is made up of engineers passionate about solving interesting problems, like loading React apps into unique places. If you have an interesting problem, we would love to work with you. Schedule your free consultation call to get started.
Do you have thoughts?
 We’d love to hear them! Join our Community Discord to continue the conversation.
Previous Post

Next Post