I’m going to show you a technique to rapidly build effective stories for apps and websites. We use this technique on client projects to quickly build bite-sized stories that maximize customer value, avoid risk, and minimize blockers.
The example we will use is the Team Member List page from Bitovi’s internal staffing app. You’ll learn the details of this particular user experience and see how it breaks down into shell stories.
Imagine you are a TPO, PM, or engineer tasked with building out a development plan for this work. Let’s get started breaking things down.
What You Know About the Project
You’ve just been given high-fidelity mockups and a designer walked you through the functionality. You’ve decided that “Implement the Team Members page” is an epic’s worth of work.
From Epic to Shell Stories in 6 Steps
How do you go from the “Implement the Team Members page” epic to actionable stories or tasks that a developer can work on?
I will show you! The steps are:
Step 1: Create an initial list of the names of shell stories.
Step 2: Prioritize the list of shell stories.
Step 3: Partially refine the first shell story with our famous +/-/? method.
Step 4: Add the minuses of the shell story ( - ) to the list.
Step 5: Update the title of the shell story to match its scope.
Step 6: Repeat with the next shell story.
Look for each of these steps as you read on.
Your Goal: Create 🐚Shell🐚 Stories
You’ll be breaking your epic down into shell stories. Shell stories are stories that don’t have all the information needed to perform development but adequately explain the rough idea of what needs to be done.
Once you have shell stories, you can turn them into complete user stories with all the information that is needed by the development team.
For now, I’m focusing on creating shell stories. It’s a small (but important!) project management technique.
(There’s a lot more theory around creating stories. So, I’ve included a few resources to get you started at the end of this article.)
How to Create a List of Shell Stories
First, DO NOT create your shell stories as actual stories in project management software like Jira. Instead, we will create shell story descriptions in a bulleted list. That bulleted list can be anywhere. I often put the shell stories list in the epic’s description or comments.
The goal of this technique is to rapidly prototype your stories to avoid blockers and risks before creating them in some project management software. We’re being agile even when we do project management!
The result of our shell stories will be a prioritized bulleted list that looks like this:
-
Shell story
+ subtask
+ subtask
- out of scope subtask
? question -
Shell story
+ subtask
We will discuss what the plusses ( + ), minuses ( - ) and question marks ( ? ) mean a bit later.
How to Figure Out Which Stories to Create
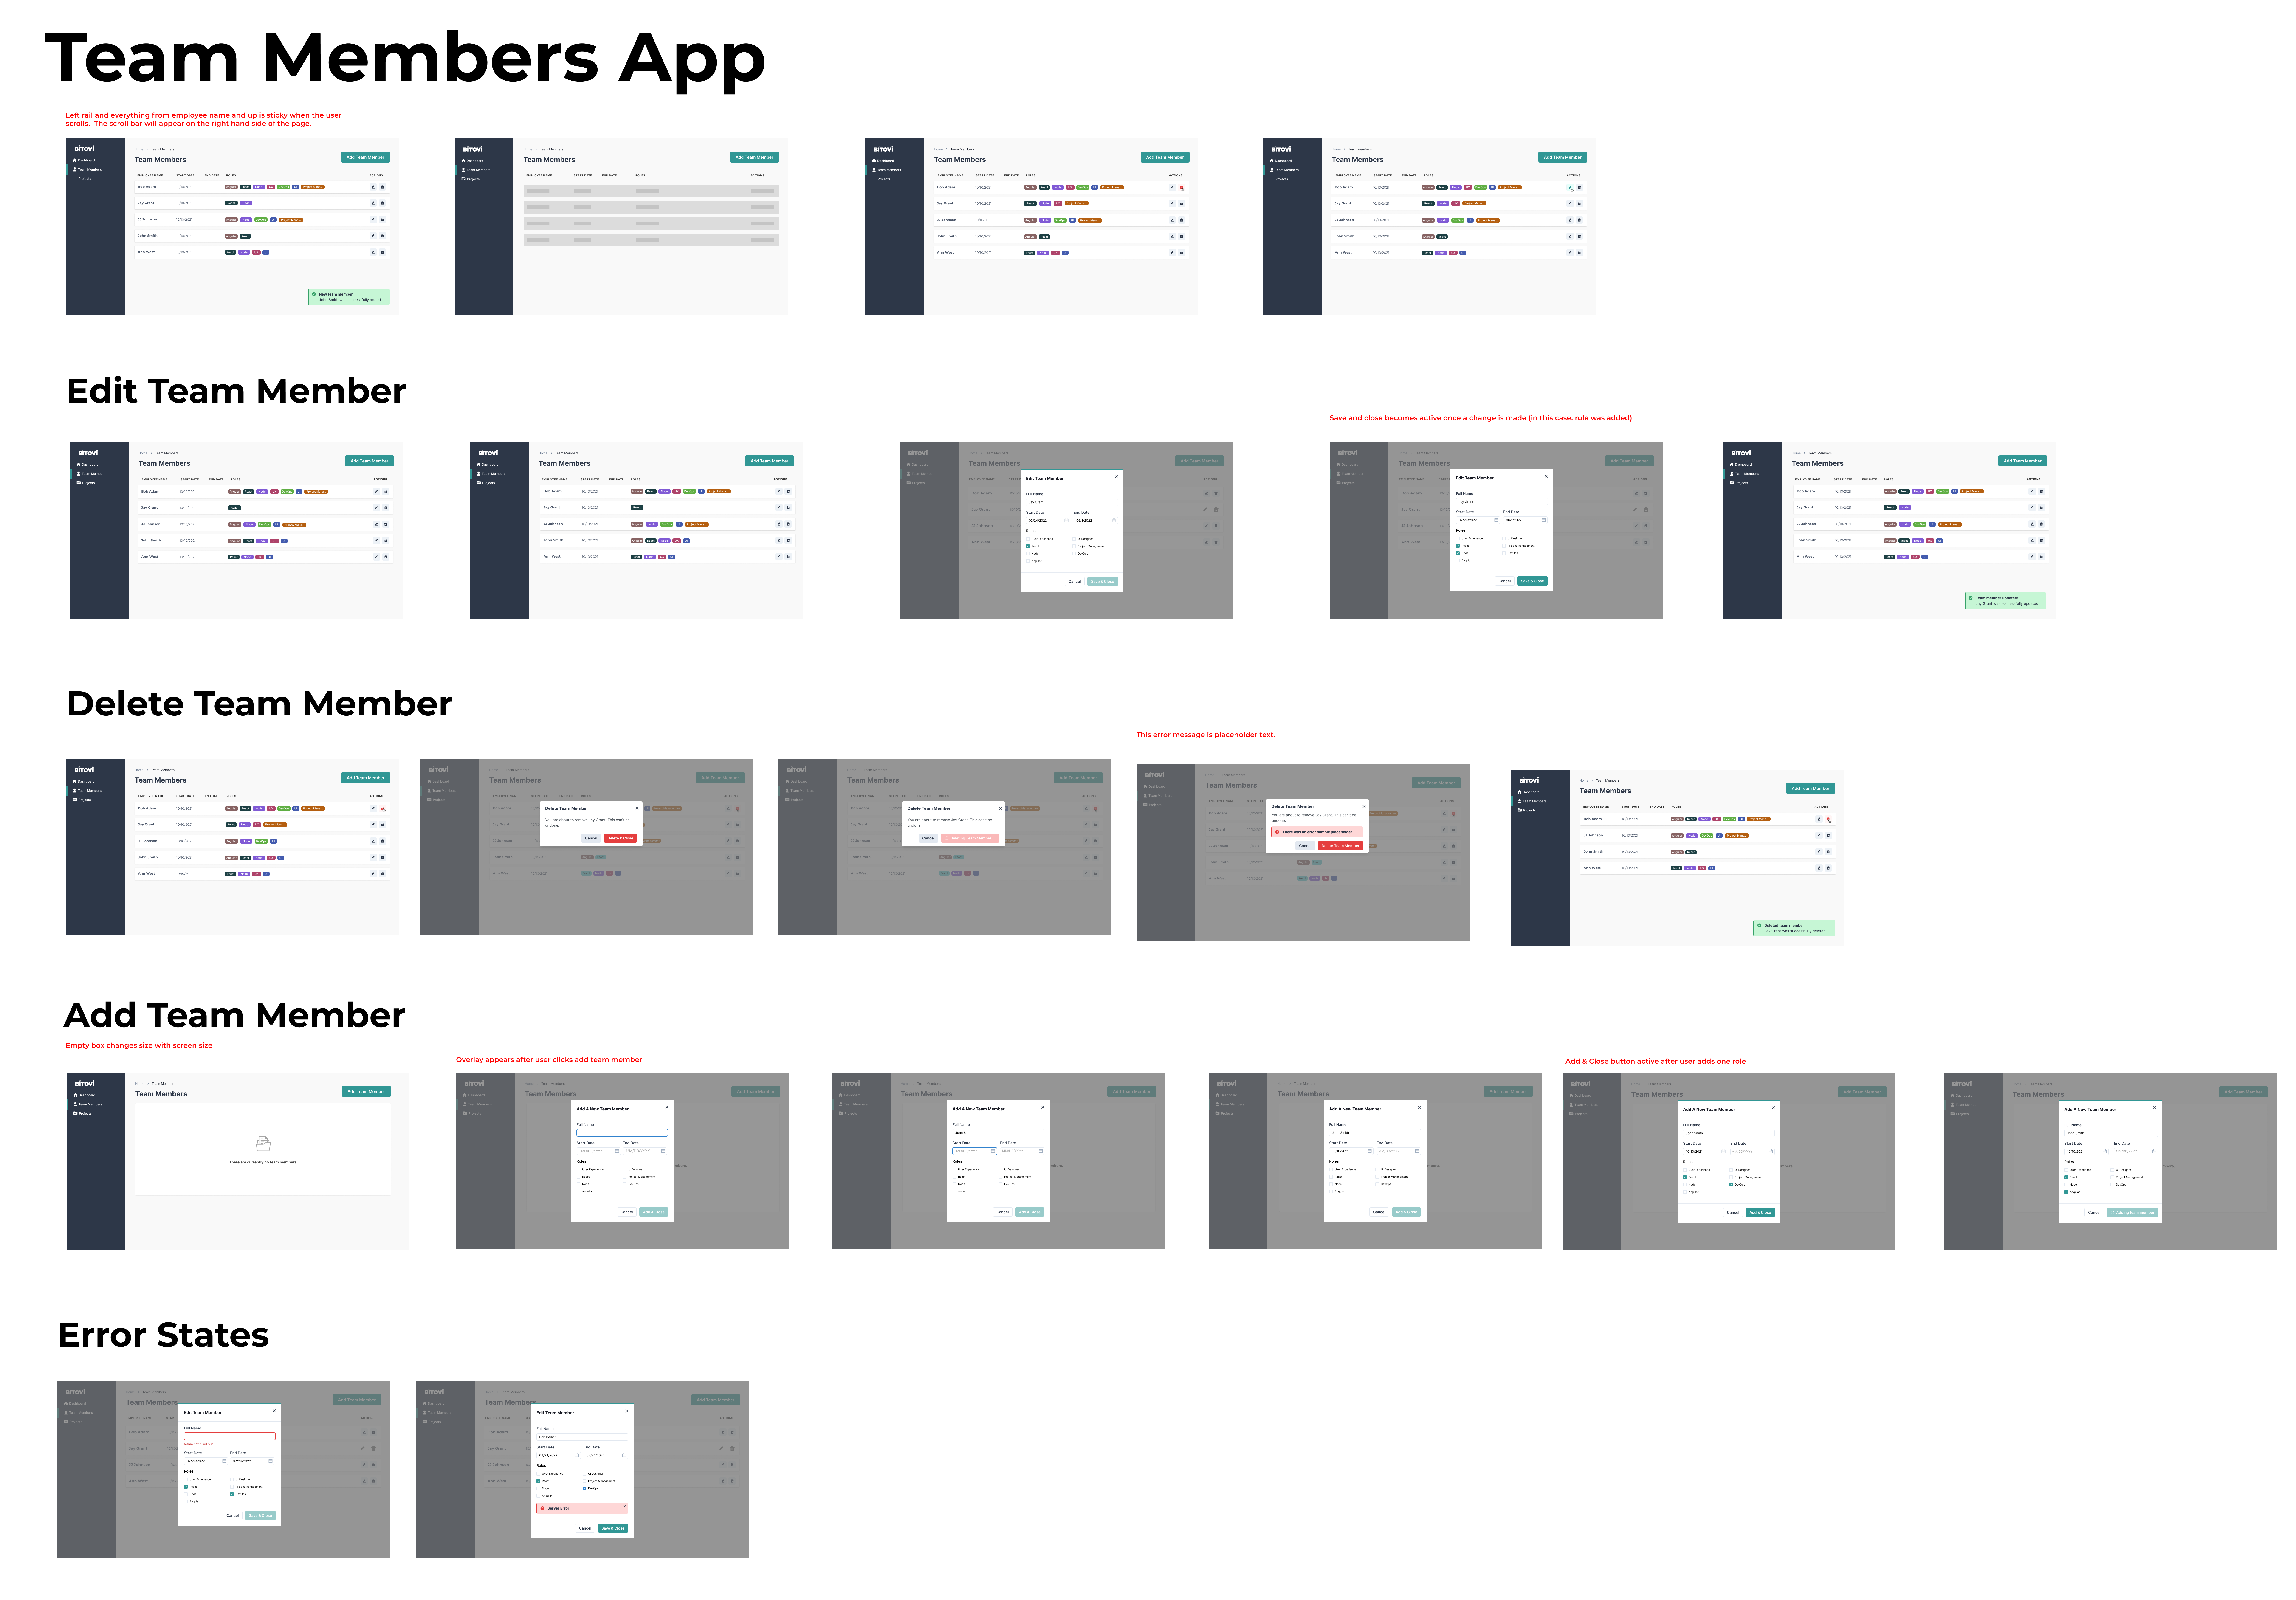
Take a look at this overview of the app. You can view a high-fidelity mockup here. Or watch a video overview here.
Step 1: Create an initial list of the names of shell stories.
At a glance, you can see that you need to create these stories:
- Edit
- Delete
- Add
- Error States
There are other less apparent stories that you need to build. For example, the app needs to display a list of team members (shown in the top row of mockup), so you should create a List story.
| Before | After |
|
|
You can and likely will add more stories as you write the subtasks for the stories you’ve already identified. However, the list above covers the major pieces of functionality and is a good starting point to talk about prioritization.
How to Prioritize Functionality
Ordering shell stories correctly results in more efficient development. You should order stories with these considerations:
-
Ordered by value to the customer.
-
Ordered to avoid blockers.
-
Ordered to avoid risk (or support early error detection).
(Check out The Humanizing Work Guide to Splitting User Stories for a more in-depth walkthrough of prioritization techniques.)
Step 2: Prioritize the list of shell stories.
The Team Members app allows you to edit, delete, add, and list team members. If you think about it, the app is somewhat useful as soon as you can see a list of team members, so ordering List first makes sense.
| Before | After |
|
|
You continue prioritizing this broad list with the techniques above. And you order the list to maximize value to the customer as each feature is released.
Consider the value to the customer, in this case, Bitovi. We’re hiring and we’re adding more team members than deleting. Add has more value to us than Delete or Edit.
Now you have a list and can add team members. So you need to decide if you want Edit or Delete next. It makes more sense to have Delete before Edit. If the user needs to edit a team member, they can just Delete and add again.
This changes the order:
| Before | After |
|
|
Broad features are now ordered. Next, you’ll partially refine your first shell story.
How to Partially Refine a Shell Story
The shell stories you’ve listed are very broad. They are so broad that each will need to be split into multiple additional shell stories. You’ll want to identify what features or work must be included in the story, what features or work can be done in future stories, and any questions you have about the work or requirements.
To do this identification, we look over the app and note these ideas below each shell story as follows:
-
Shell story
+ feature
+ subtask
- out of scope feature
? question
Subtasks mean anything you need to include in the story to complete it, any work that needs to be done for the story.
Put a plus sign (+) in front of work that needs to be included in this story. Sometimes these will result in more subtasks as you keep working on the list.
Use a question mark (?) if you need more information to resolve or clarify something.
Use a minus (-) if the work is out of scope, and should not be included in this story. It’s typically work that will be incorporated into later stories.
Step 3: Partially refine the first shell story with our famous +/-/? method.
You need to add detail and divide your shell stories into more shell stories. Start by looking at the List page mockups. There are several variations.
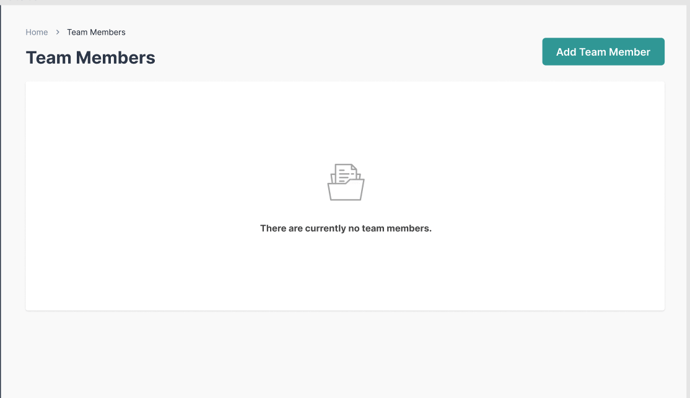
List with no team members:

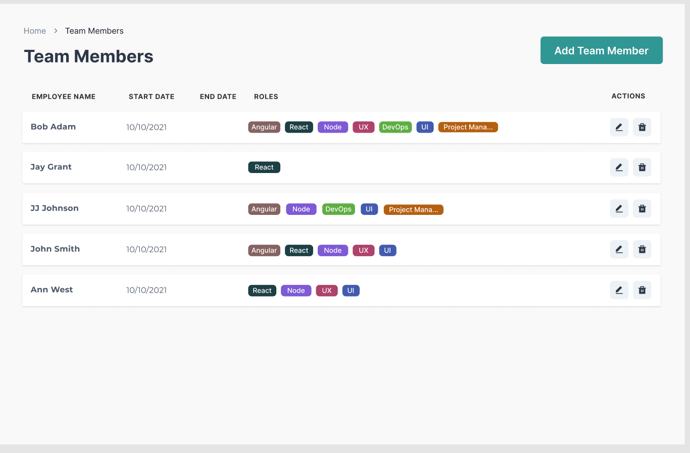
List of team members, their start and end dates, and their roles:

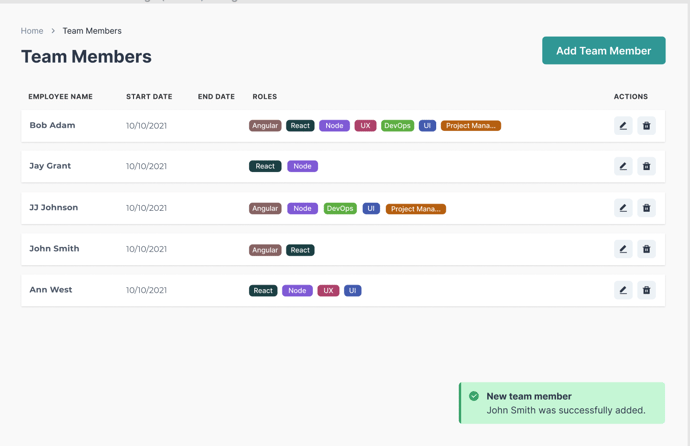
The list page also displays a green message box when the user adds, edits, or deletes a team member:

Write out work tasks needed to create this page, with everything you see. Use plusses (+) for what MUST be done now and minuses (-) for what can be done later:
| Before | After |
|
|
Later on, you will turn the minuses into stories of their own. For now, you need to make sure all the plusses are fully fleshed out with what needs to be done for the story.
Getting a list of employees requires a few more steps, for example, the page will need to get the data from the service layer. Break that work down as nested lists under list of employees. If you have a question about one of these things, use a question mark:
| Before | After |
|
|
Step 4: Add the minuses of the shell story ( - ) to the list.
Take the minuses under List and turn these things into their own top-level stories, making sure you prioritize based on customer value.
| Before | After |
|
|
Step 5: Update the title of the shell story to match its scope.
You should change List to List basic employee data because it better summarizes the work to be done.
| Before | After |
|
|
You have what is likely your first story: List basic employee data! This story is a great first story. It’s minimal, but somewhat useful to users. We’ve also identified the story’s subtasks:
-
Create a migration
-
Prepopulate the table with team members
-
Make a service layer
And you have a nice list of what is NOT in scope in that story which you can use when fully refining the user story. Now you can work on the next story.
How to Choose the Next Story to Build
You should choose the next highest priority story to build. Here’s why:
-
When you start at the next high-priority story and build it out, it might influence the shape of future stories in unexpected ways.
-
You might not have time to build out every story before development starts. You need to make sure you build stories for what’s likely to add the most value.
Step 6: Repeat with the next shell story.
For this app, Roles for the List page needs to come after List and before Add. Knowing what roles an employee has is a bit more immediate value to the customer than being able to Add a new employee.
Take a closer look at how the app uses Roles on the List page.

Now build the Roles story that will come after the List but before the Add:
| Before | After |
|
|
Now you can work on the Add story. You need only make the very basics work. There’s no need to make all the modal functionality or client validation work.
| Before | After |
|
|
All the Shell Stories
Here’s the final list for the epic. It’s important to review these shell stories with the team before you start putting them into project management software such as Jira.
And it’s OK if you don’t remember everything here because you’ll catch these mistakes as you review with the dev team.
Click here to see the full list of shell stories
-
List basic employee data
+ Make a service
? What type of service
+ Create seed data to prepopulate with team members
+ Create a migration to create the table structure
- empty state
- roles
- breadcrumbs
- toast messages
- styling -
List page includes employee roles
+ Update the table to show rows
+ Change `get /employees` to include the related data
+ Seed those relationships
+ Create the roles_employees join table -
Add employee basics
+ Show form when the “Add new” button is clicked
+ Update the service layer to GET roles
+ Allow a user to enter employee information and click submit
+ Update the service layer to handle CREATE employees
+ Update the table when the employee has been created
- validation
- cancel & close modal button
- saving state
- toast message -
Delete an employee
+ Modal confirmation
+ Delete the employee and update the table
+ Update the service layer to handle DELETE
- toast message
- deleting state
- service errors -
Edit employee basics
+ Show populated edit form when the “edit” button is clicked
+ Allow a user to change employee information and click submit
+ Update the service layer to handle UPDATE employees
+ Update the table when the employee has been changed
- validation
- cancel & close modal button
- saving state
- toast message -
Styling
+ implement styles for list page, modals and forms -
Validation
-
Modal Cleanup
+ cancel & close modal button
+ saving state -
Error handling
-
Toast Messages
-
Breadcrumb
-
Empty state
Hopefully, you’ve learned a valuable technique for creating shell stories that focuses on prioritizing to remove risk and unlocking functionality while maximizing customer value.
Was there something I missed? Let me know in our community slack! If you need additional experienced project management support, be sure reach out to us here at Bitovi.
Learn More
If you’d like to take a deeper dive into project management theory, here are a few resources to get you started:
Previous Post
Next Post


