


Setting Up Your Environment page
Learn how to set up a Node environment with TypeScript.
Overview
In this section, you will:
- Install Node.js and npm
- Use npm to initialize a new Node application
- Add TypeScript to a project
- Use
ts-nodeto run TypeScript - Write TypeScript tests in a Node project
Objective 1: Install prerequisites
Before we start writing code, we need to install the prerequisites.
Installing Node.js and npm
This course requires the Node.js JavaScript runtime
environment. Node.js and its included package manager npm will be used to do a
variety of tasks, including: installing required packages, compiling TypeScript files into JavaScript,
and executing tests.
This course requires Node.js v18.17.0 or newer, or v20.1.0 or newer.
Setup 1
Follow npm’s instructions to install Node.js.
During the installation process, you may be prompted to make selections or install prerequisites. Use the default selections and proceed with the installation.
The installation process can take 10 to 15 minutes to complete.
macOS
On macOS, we recommend using nvm to install Node because it allows you to manage multiple versions of Node for different projects.
Windows
On Windows, we recommend using NVM for Windows to install Node because it allows you to manage multiple versions of Node for different projects.
You can also follow Microsoft’s instructions for setting up Node.js on Windows.
For some of the instructions, you may need to open the command prompt or PowerShell as an administrator.
Verify 1
✏️ Run the following command to verify Node.js is installed correctly:
node --version
The output of the command will be the current version of Node.js. It should start with either “v18” or “v20”.
✏️ Run the following command to verify npm is installed correctly:
npm --version
The output of the command will be the current version of npm.
It should start with either “9” or “10”.
Objective 2: Initialize a Node project
Let’s create a new Node project that supports TypeScript and can be tested.
Using npm to initialize a new Node application
For this course, we will use npm to initialize our application.
npm is a command line interface (CLI) tool that is used
in every Node.js project. npm’s primary purpose is to take a list of dependencies
in a project (in the package.json file) and install them locally.
npm init is the command for
creating a new package.json file.
Setup 2
✏️ Run the following command to create a new learn-typescript folder:
mkdir learn-typescript
✏️ Run the following command to change directories (cd):
cd learn-typescript
Now cd into the new directory created for the application, initialize the package.json,
and install the required packages:
✏️ Run the following command to create a new package.json file:
npm init --yes
Verify 2
Your learn-typescript folder should now have one file:
├── package.json
Objective 3: Install TypeScript
Adding TypeScript to a project
This entire course will focus on TypeScript, so we’ll need to add it to our project!
Other tutorials may encourage you to install TypeScript globally, but this has the downside of using one TypeScript version for all of your projects.
Instead, we think it’s best to install TypeScript as a dependency to your project so the version is always correct.
Setup 3
✏️ Run the following command to add the typescript package to your project:
npm install --save-dev typescript@~5.4
✏️ Run the following command to create the tsconfig.json file in your project:
npx tsc --init
In the command above, npx will find the tsc (TypeScript) binary in our node_modules folder.
Verify 3
Your learn-typescript folder should now have these files:
├── node_modules/
├── package-lock.json
├── package.json
├── tsconfig.json
Objective 4: Create your first TypeScript file
Using ts-node to run TypeScript
Out of the box, Node.js does not have any support for TypeScript.
We will install a dependency called ts-node that will compile our TypeScript to JavaScript
before running it.
Once we have ts-node installed, we can use npx again to run the ts-node binary.
Setup 4
✏️ Run the following command to add the ts-node package to your project:
npm install --save-dev ts-node@10
✏️ Run the following command to create the src and src/hello-world folders:
mkdir -p src/hello-world
✏️ Create src/hello-world/greetings.ts and update it to be:
function greeter(person: string) {
    return "Hello, " + person;
}

let user = "World";

console.info('Greeting:', greeter(user));
Verify 4
✏️ Run the following command to run the TypeScript code:
npx ts-node src/hello-world/greetings.ts
Solution 4
After running the command above, you should see:
Greeting: Hello, World
Congrats! You’ve written and run your first TypeScript application.
Having issues with your local setup? See the solution in StackBlitz or CodeSandbox.
Bonus challenge
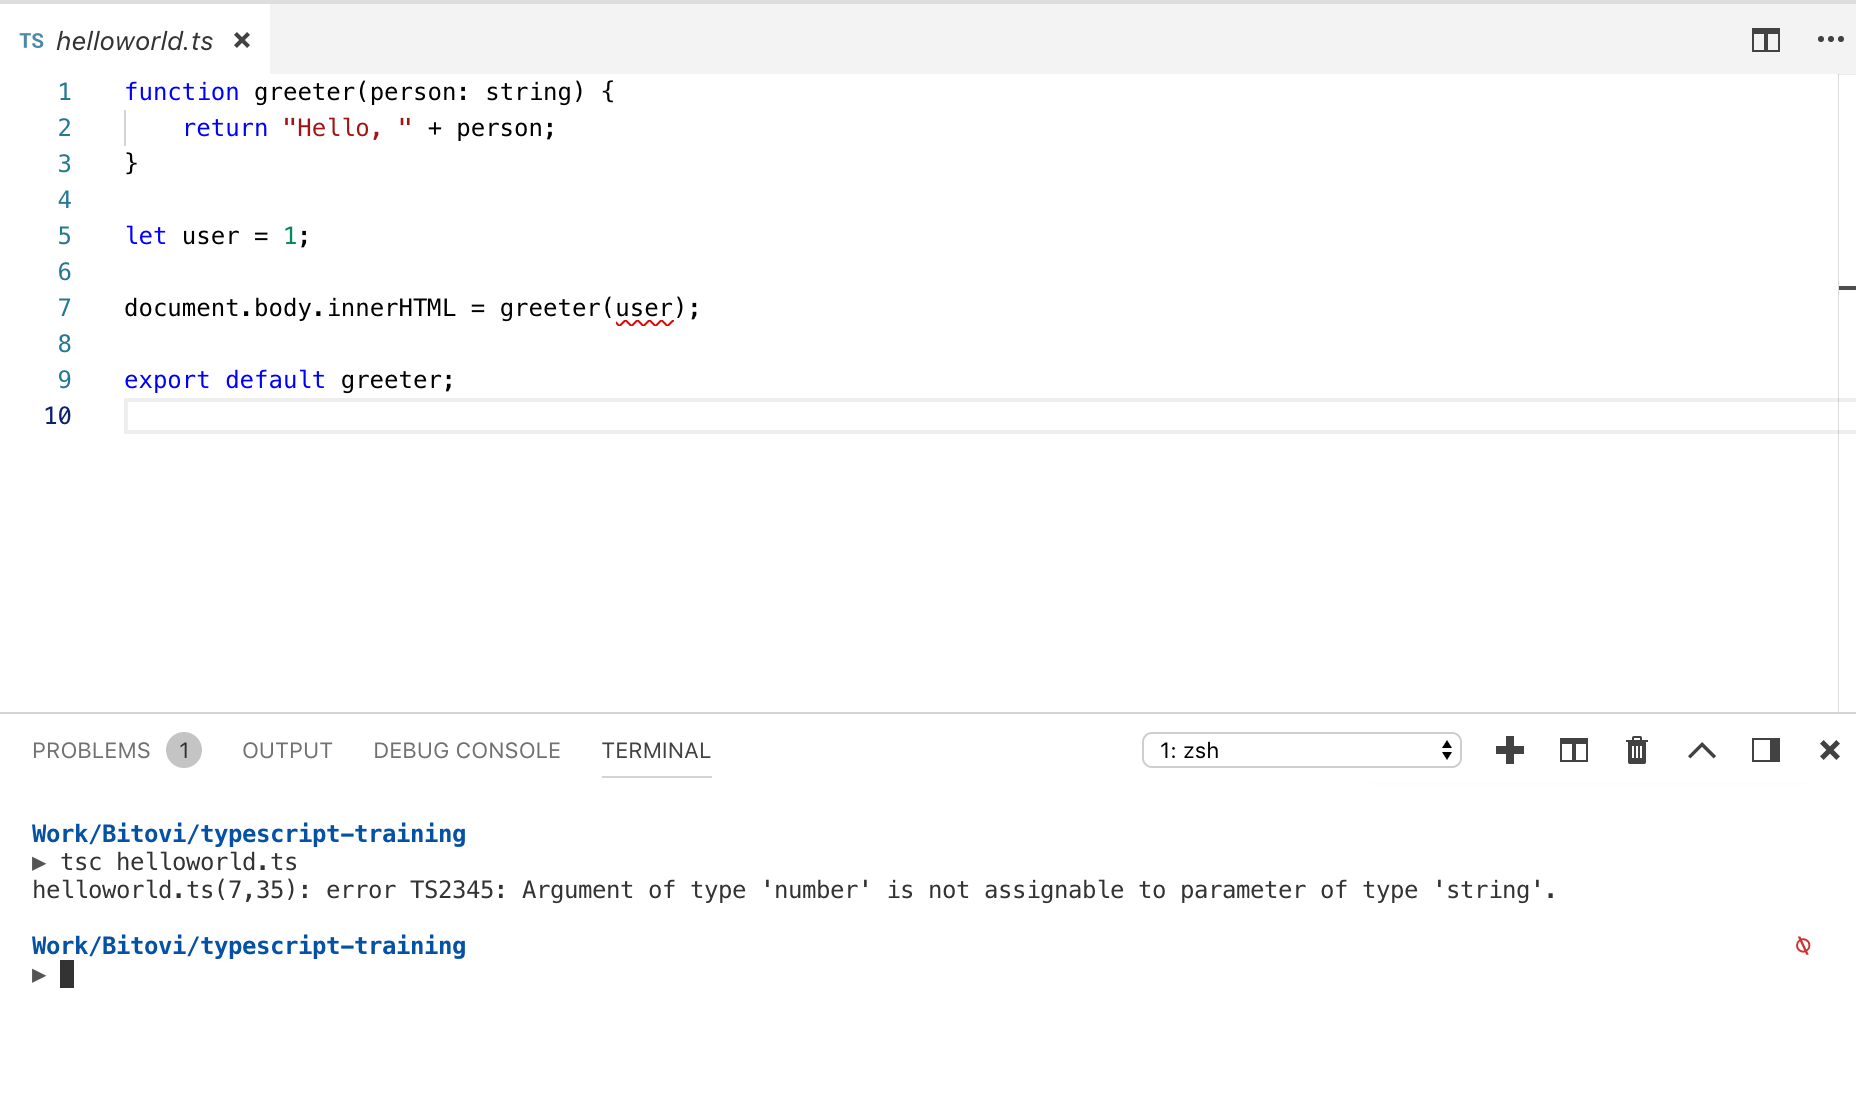
Change the user variable to a number and compile again. What do you think will happen?
You should see an error message.
View the error message.
TSError: ⨯ Unable to compile TypeScript:
src/hello-world/greetings.ts:7:35 - error TS2345: Argument of type 'number' is not assignable to parameter of type 'string'.

7 console.info('Greeting:', greeter(user));
                                    ~~~~
Objective 5: Create your first test file
Writing TypeScript tests in a Node project
Out of the box, Node.js does have support for writing tests. We will use its built-in assertion library and test-runner for our TypeScript tests.
Setup 5
✏️ Create src/hello-world/greetings.test.ts and update it to be:
import assert from 'node:assert/strict';
import { describe, it } from 'node:test';

describe('Hello world', () => {
    it('should run successfully', () => {
        assert.ok(true);
    });
});
✏️ Update package.json to be:
{
  "name": "learn-typescript",
  "version": "1.0.0",
  "description": "",
  "main": "index.js",
  "scripts": {
    "test": "node --require ts-node/register --test src/**/**.test.**"
  },
  "keywords": [],
  "author": "",
  "license": "ISC",
  "devDependencies": {
    "ts-node": "^10.9.2",
    "typescript": "~5.4"
  }
}
Verify 5
Run the tests in your terminal:
npm run test
Solution 5
After running the command above, you should see something like:
> learn-typescript@1.0.0 test
> node --require ts-node/register --test src/**/**.test.**

▶ Hello world
  ✔ should run successfully (0.137542ms)
▶ Hello world (0.96625ms)

ℹ tests 1
ℹ suites 1
ℹ pass 1
ℹ fail 0
ℹ cancelled 0
ℹ skipped 0
ℹ todo 0
ℹ duration_ms 540.290334
Having issues with your local setup? See the solution in StackBlitz or CodeSandbox.
Next steps
Next we will learn how to import and export functions between Modules.