
Last time, we had refactored our basic one-line install of StackStorm and our custom pack into an Ansible playbook. The Ansible playbook works well enough on its own but still requires us to already have a server setup for Ansible to execute the playbook on. What if we didn't need that pre-existing server and were able to on-the-fly provision one for our playbook? This arena is where Infrastructure-as-Code (IAC) initiatives really shine and where I would now like to introduce BitOps.
If you want to skip ahead, you can view the final code on Github.
This is the third part in a StackStorm tutorial series:
- Part 1: DevOps Automation using StackStorm - Getting Started
- Part 2: DevOps Automation using StackStorm - Deploying With Ansible
- Part 3: DevOps Automation using StackStorm - Cloud Deployment via BitOps
- Part 4: DevOps Automation using StackStorm - BitOps Secrets Management
This article assumes that you have completed or read over and have some familiarity with the previous articles, as this blog will serves to expand on the concepts and code previously developed. If you want to jump start yourself and just dive in here, just grab the files from the GitHub for the previous article.
To finish this tutorial you will need:
- npm
- docker
- A GitHub account with personal access key
- An AWS account with an aws access key and aws secret access key
If your AWS account is older than 12 months and you are outside of AWS’ free tier, this tutorial will cost $0.0464 hourly as we will deploy StackStorm to a t2.medium EC2 instance.
What is BitOps?
In a nutshell BitOps is a specialized docker container for driving Infrastructure-as-Code initiatives. By creating an 'Operations Repository' BitOps enables a developer to structure common DevOps deployment schemas in a logical way using basic YAML files and execute them in the cloud. In other words, if you have an app that utilizes Docker, Ansible, Helm, Terraform, or combinations of any/all of the above, you can rapidly port its infrastructure into an operations repo and easily deploy and teardown complete servers hosting your app in the cloud, all with a single command.
In our Operations Repo we define what deployment tools we want to use, which in this case will be Ansible for our existing playbook data from the previous article, and we will introduce Terraform to our deployment to assist with provisioning our AWS instance.
While we will be focusing in this article deploying StackStorm with BitOps, you will find many of these concepts useful in showing how we can port any application to a BitOps compatible structure. Additionally, much of the information in this guide is an application of concepts initially explored in a blog post written by my cohort Connor, if you want a more generic version of this guide, please direct your attention to his article here.
Out with the Old
From our previous articles or, if you've dove straight in with code from GitHub, we have a custom ST2 workflow pack in a private repo and an Ansible deployment playbook. To this, we will be creating a BitOps operations repo structure that will house our existing Ansible playbook and our new Terraform provisioning code. We will also be modifying our Ansible playbook to demonstrate adapting our code to BitOps' operations repo structure.
Terraform allows us to define our server infrastructure and deploy it to a selection of cloud providers, in this case Amazon's AWS platform. Working through this article we will be creating several template and configuration that will define the aspects of our instances, such as: instance specifications (resources/type & OS), security groups, firewall configuration, S3 bucket creation and naming, ssh key access, and everything in between.
BitOps has a handy way of building out a basic operations repo structure using Yeoman, after which we copy in our previous ansible-st2 playbook data to the aptly named ansible directory of our 'Ops Repo'.
Install yeoman and generator-bitops, and then create an operations repo:
npm install -g yo
npm install -g @bitovi/generator-bitops
yo @bitovi/bitops
When prompted, name your application st2-bitops-test, answer “Y” to Terraform and Ansible, and “N” to the other supported tools. After your repo is created, copy the previous Ansible playbook data you already have or get it from GitHub.
After we copy in our files copied into the operations repo and follow this guide, we will eventually have something that looks similar to this:
operations_repo:
├── _scripts
|    └── ansible
│        ├── wait-for-inventory-hosts.py
│        └── wait-for-it.sh
└── st2-bitops-test
    ├── ansible
    │   ├── README.md
    │   ├── ansible.cfg
    │   ├── bitops.after-deploy.d
    │   ├── bitops.before-deploy.d
    │   │   └── my-before-script.sh
    │   ├── bitops.config.yaml
    │   ├── extra-vars.json
    │   ├── meta
    │   ├── roles
    │   │   ├── StackStorm.epel
    │   │   ├── StackStorm.ewc
    │   │   ├── StackStorm.ewc_smoketests
    │   │   ├── StackStorm.git
    │   │   │   ├── handlers
    │   │   │   │   └── main.yml
    │   │   │   ├── tasks
    │   │   │   │   └── main.yml
    │   │   │   └── vars
    │   │   │       └── main.yml
    │   │   ├── StackStorm.mongodb
    │   │   ├── StackStorm.nodejs
    │   │   ├── StackStorm.rabbitmq
    │   │   ├── StackStorm.st2
    │   │   ├── StackStorm.st2chatops
    │   │   ├── StackStorm.st2repo
    │   │   ├── StackStorm.st2smoketests
    │   │   └── StackStorm.st2web
    │   ├── stackstorm.yml
    │   └── test
    └── terraform
        ├── bitops.after-deploy.d
        │   └── my-after-script.sh
        ├── bitops.before-deploy.d
        │   └── my-before-script.sh
        ├── bitops.config.yaml
        ├── inventory.tf
        ├── inventory.tmpl
        └── main.tf
We use _scripts at the top level to house any custom scripts we need in our deployment. These are easily accessible using the built in BitOps env var TEMPDIR. The other directory st2-bitops-test is our BitOps environment.
There's a handful of new files making their appearance here. Those being the: terraform directory, ansible/extra-vars.json file, and the bitops.config.yaml and bitops.after-deploy.d & bitops.before-deploy.d files which exist for both Ansible and Terraform in our BitOps operations repo. All of the other code remains the same as it was from the previous guide, we have just simply moved our playbook code under the ansible directory.
Next we just need to make sure we have our BitOps image which is available on Docker Hub:
docker pull bitovi/bitopsLet us start with showing off the new parts, starting with terraform, and we will then follow through with how we will be modifying our previously created code.
In with the New
We have a few different pieces to address on our agenda of moving to a BitOps deployment. In this section we will:
- Set up
main.tfwhere we define the minutiae of our AWS instance configuration for our Terraform module - Create
ansible/bitops.config.yamlfor variables needed by our Ansible playbook which will play an important role in our structure going forwards - Lastly, customize BitOps' behavior with lifecycle hooks
First up for Terraform, we have our
main.tf file, as a reminder the full code for this tutorial is available on our GitHub.
st2-bitops-test:
└── terraform
    └── main.tf
terraform {
required_providers {
aws = {
source = "hashicorp/aws"
version = "~> 3.0"
}
}
backend "s3" {
bucket = "st2-bitops-bucket"
key = "state"
}
}
data "aws_region" "current" {}
resource "aws_vpc" "main" {
cidr_block = "10.0.0.0/16"
}
resource "aws_internet_gateway" "gw" {
vpc_id = aws_vpc.main.id
}
resource "aws_subnet" "main" {
vpc_id = aws_vpc.main.id
cidr_block = aws_vpc.main.cidr_block
availability_zone = "${data.aws_region.current.name}b"
}
resource "aws_route_table" "rt" {
vpc_id = aws_vpc.main.id
route {
cidr_block = "0.0.0.0/0"
gateway_id = aws_internet_gateway.gw.id
}
}
resource "aws_route_table_association" "mfi_route_table_association" {
subnet_id = aws_subnet.main.id
route_table_id = aws_route_table.rt.id
}
data "aws_ami" "ubuntu" {
most_recent = true
filter {
name = "name"
values = ["ubuntu/images/hvm-ssd/ubuntu-bionic-18.04-amd64-server-*"]
}
filter {
name = "virtualization-type"
values = ["hvm"]
}
owners = ["099720109477"]
}
resource "tls_private_key" "key" {
algorithm = "RSA"
rsa_bits = 4096
}
resource "aws_key_pair" "aws_key" {
key_name = "st2-bitops-ssh-key"
public_key = tls_private_key.key.public_key_openssh
}
resource "aws_security_group" "allow_http" {
name = "allow_http"
description = "Allow HTTP traffic"
vpc_id = aws_vpc.main.id
ingress {
description = "HTTP"
from_port = 80
to_port = 80
protocol = "tcp"
cidr_blocks = ["0.0.0.0/0"]
}
egress {
from_port = 0
to_port = 0
protocol = "-1"
cidr_blocks = ["0.0.0.0/0"]
}
}
resource "aws_security_group" "allow_https" {
name = "allow_https"
description = "Allow HTTPS traffic"
vpc_id = aws_vpc.main.id
ingress {
description = "HTTPS"
from_port = 443
to_port = 443
protocol = "tcp"
cidr_blocks = ["0.0.0.0/0"]
}
egress {
from_port = 0
to_port = 0
protocol = "-1"
cidr_blocks = ["0.0.0.0/0"]
}
}
resource "aws_security_group" "allow_ssh" {
name = "allow_ssh"
description = "Allow SSH traffic"
vpc_id = aws_vpc.main.id
ingress {
description = "SSH"
from_port = 22
to_port = 22
protocol = "tcp"
cidr_blocks = ["0.0.0.0/0"]
}
egress {
from_port = 0
to_port = 0
protocol = "-1"
cidr_blocks = ["0.0.0.0/0"]
}
}
resource "aws_instance" "server" {
ami = data.aws_ami.ubuntu.id
instance_type = "t2.medium"
key_name = aws_key_pair.aws_key.key_name
associate_public_ip_address = true
subnet_id = aws_subnet.main.id
vpc_security_group_ids = [aws_security_group.allow_http.id, aws_security_group.allow_https.id, aws_security_group.allow_ssh.id]
tags = {
Name = "BitOps - StackStorm test instance"
}
}
To briefly cover some of the specific options:
backend "s3" {bucket = "st2-bitops-bucket"...- we set our AWS instances S3 bucket to look for the same S3 bucket name that will be passed in as a BitOps environmental variable.data "aws_ami" "ubuntu" ... values = ["ubuntu/images/hvm-ssd/ubuntu-bionic-18.04-amd64-server-*"]- StackStorm does not support Ubuntu 20.04(Focal), so we set ourselves to use 18.04(Bionic).resource "aws_key_pair" "aws_key" {key_name = "st2-bitops-ssh-key"...- We tell our AWS instances which SSH key to use. If you have a custom SSH key already set in AWS, this is where you could define that key instead of the one created by Terraform.resource "aws_security_group" "allow_https"- StackStorm prefers HTTPS access, which means we need to ensure that port 443 is open for our new AWS server. We address this by creating a security groupresource "aws_instance" "server" {... instance_type = "t2.medium"- Here is where we can specify what AWS instance type, and by association the allocated resources for StackStorm. Here we are using StackStorm's recommended instance size of at2.mediumfor a dev/test environment.vpc_security_group_ids = [aws_security_group.allow_http.id, aws_security_group.allow_https.id, aws_security_group.allow_ssh.id]- At the same time as we define our instance type, we also make sure the server is added to all of the security groups we defined above so HTTPS access is available.
Next, we have our inventory.tf and inventory.tmpl files respectively.
st2-bitops-test:
└── terraform
    └── inventory.tf
resource "local_file" "private_key" {
sensitive_content = tls_private_key.key.private_key_pem
filename = format("%s/%s/%s", abspath(path.root), ".ssh", "st2-bitops-ssh-key.pem")
file_permission = "0600"
}
resource "local_file" "ansible_inventory" {
content = templatefile("inventory.tmpl", {
ip = aws_instance.server.public_ip,
ssh_keyfile = local_file.private_key.filename
})
filename = format("%s/%s", abspath(path.root), "inventory.yaml")
}st2-operations-repo:
└── terraform
└── inventory.tmplbitops_servers:
hosts:
${ip}
vars:
ansible_ssh_user: ubuntu
ansible_ssh_private_key_file: ${ssh_keyfile}These template files will utilize the information generated from our main.tf file and create a /terraform/inventory.yaml file which will list the IPs of our created instances as well as an SSH key the running BitOps container will use to connect to those instances.
And, lastly but not forgotten, similar to what you will see with ansible there's a counterpartbitops.configschema file for Terraform - terraform/bitops.config.yaml
st2-bitops-test:
└── terraform
    └── bitops.config.yaml
terraform:
cli: {}
options:
command: apply
version: "0.13.2"
fetch-kubeconfig: falseWhich executes the terraform apply action, which is the command which really starts our AWS instance creation. If we needed to execute other options or environmental variables when running our Terraform module, here is where we can do it.
With all of the Terraform pieces in place we should have something that looks similar to this:
st2-bitops-test:
└── terraform
    ├── bitops.after-deploy.d
    ├── bitops.before-deploy.d
    │   └── my-before-script.sh
    ├── bitops.config.yaml
    ├── inventory.tf
    ├── inventory.tmpl
    └── main.tf
Newly added to our Ansible code is ansible/bitops.config.yaml which will play an important role in our structure going forwards:
st2-bitops-test:└── ansible └── bitops.config.yaml
ansible:
    cli:
      extra-vars: "@extra-vars.json"
    options: {}
Previously we had a few options we had to pass in to our playbook as it ran so that it would install our custom packs and do some other setting up. We are going to move those runtime variables to an external file extra-vars.json that makes infrastructure management and scaling both cleaner and easier. Also note the use of the clifield. Where Terraform used options: \ command:to runapply, we use cli instead to specify command line option flags.
Now for the extra-vars.jsonfile itself:
st2-bitops-test:
└── ansible
    └── extra-vars.json
{"ansible_python_interpreter":"/usr/bin/python",
"st2_auth_username":"st2admin",
"st2_auth_password":"Ch@ngeMe",
"github_token":"{{ lookup('env','ST2_GITHUB_TOKEN') }}"
"st2_packs":["st2","https://dylan-bitovi:{{ github_token }}@github.com/dylan-bitovi/my_st2_pack.git"]
}The first thing you might notice if you've been following along with the past guides, is that our github_token has changed slightly. In the last article we passed our github_token in directly at run-time. We will be continuing this process however we will pass it in as a BitOps environmental variable when we run the BitOps container; we update our extra-vars accordingly to call the new BitOps env-var using "{{ lookup('env','ST2_GITHUB_TOKEN') }}".
The second thing you may notice is the new option ansible_python_interpreter. The ansible-st2 playbooks are developed around python2.7+, the BitOps container is built with python3+. If the playbook is run without first defining our interpreter, Ansible will by default automatically detect which python version use in the gather_facts step of playbook execution, which by default would be python3+ same as the BitOps container.
Note, this merely tells Ansible where to look for our python binary. Later on, we will add in additional steps later to ensure that python2 is installed on our instances before running the Ansible playbook to deploy StackStorm.
Rounding out the new parts of our infrastructure are the bitops.after-deploy.d & bitops.before-deploy.d lifecycle script directories. These folders are an aspect of BitOps where arbitary pre and post execution scripts can be run for any of the BitOps tools. We will utilize this feature twice over the course of this guide
For Terraform, we have a pre-run command that utilizes BitOps environmental variables to create a named S3 bucket:
st2-bitops-test:
└── terraform
    └── bitops.before-deploy.d
        └── my-before-script.sh
#!/bin/bash
aws s3api create-bucket --bucket $TF_STATE_BUCKET --region $AWS_DEFAULT_REGION --create-bucket-configuration LocationConstraint=$AWS_DEFAULT_REGION || trueOn the Ansible side, we have a bit more:
st2-bitops-test:
└── ansible
    └── bitops.before-deploy.d
        ├── my-before-script.sh
        ├── _scripts
        │    └── wait-for-it.sh
        └── wait-for-inventory-hosts.py
In our bitops.before-deploy.d directory for ansible, instead of running an arbitrary command, we instead execute an arbitrary python script:
st2-bitops-test:
└── ansible
    └── bitops.before-deploy.d
        └── my-before-script.sh
#!/bin/bash
echo "I am a before ansible lifecycle script!"
python $TEMPDIR/_scripts/ansible/wait-for-inventory-hosts.pyWhich in turn calls a custom script that looks for our newly created Terraform inventory file and if detcted, we call an open-source script to wait for our AWS instance to be ready to connect before executing our playbook:
st2-bitops-test:
└── ansible
    └── bitops.before-deploy.d
        └── wait-for-inventory-hosts.py
import yaml
import subprocess
import os
port = "22"
timeout = "60"
TEMPDIR = os.getenv('TEMPDIR')
ENVROOT = os.getenv('ENVROOT')
try:
tf_inventory_path = "{}/terraform/inventory.yaml".format(ENVROOT)
print(tf_inventory_path)
with open(tf_inventory_path,'r') as file:
try:
print("Running wait for host script:")
inventory = yaml.safe_load(file)
bitops_hosts = inventory["bitops_servers"]["hosts"]
#
# Check if single host (string), if not a string, use first host from list.
#
if isinstance(bitops_hosts, str):
print("Waiting for host:", bitops_hosts)
else:
bitops_hosts = bitops_hosts[0]
print("Waiting for host:", bitops_hosts)
wait_for_command = "{}/_scripts/wait-for-it.sh -h {} -p {} -t {}".format(TEMPDIR,bitops_hosts,port,timeout)
result = subprocess.call(wait_for_command, shell=True, stdout=subprocess.PIPE, stderr=subprocess.PIPE)
except yaml.YAMLError as exception:
print(exception)
except IOError:
print("Terraform inventory file not found. Skipping wait for hosts.")Without this slight time buffer there is a chance our Ansible playbook will attempt to execute before the AWS instance is ready to accept SSH connections. In the script you'll also see how we can reference BitOps environmental variables in python as we call in the TEMPDIR and ENVROOT vars.
Ch-Ch-Changes
With our Terraform code in place, lets first point our Ansible playbook to point at the inventory file that will be created:
st2-bitops-test:
└── ansible
    └── ansible.cfg
[defaults]
roles_path=roles/
inventory=../terraform/inventory.yaml
host_key_checking = FalseOur roles_path remains the same, but we add in a path to our Terraform inventory file, and disable strict host key checking to allow connections from unknown hosts allowing us to connect to the newly created AWS servers and run our playbook.
Previously, our stackstorm.yaml file looked like:
---
- name: Install st2
  hosts: all
  environment: "{{ st2_proxy_env | default({}) }}"
  roles:
    - StackStorm.mongodb
    - StackStorm.rabbitmq
    - StackStorm.st2repo
    - StackStorm.st2
    - StackStorm.nginx
    - StackStorm.st2web
    - StackStorm.nodejs
    - StackStorm.st2chatops
    - StackStorm.st2smoketests
    - role: StackStorm.ewc
      when: ewc_license is defined and ewc_license is not none and ewc_license | length > 1
    - role: StackStorm.ewc_smoketests
      when: ewc_license is defined and ewc_license is not none and ewc_license | length > 1
    - role: StackStorm.git
      when: github_token is defined and github_token is not none and github_token | length > 1
Now, there are a few more lines inserted near the beginning and a new pre_tasks section:
---
- name: Install st2
  hosts: all
  environment: "{{ st2_proxy_env | default({}) }}"
  gather_facts: False
  pre_tasks:
    - name: Install python2 for ansible-st2
      become: True
      raw: test -e /usr/bin/python || (apt install -y python-minimal)
      changed_when: False
    - name: Gathering facts
      setup:
  roles:
    - StackStorm.mongodb
    - ...
The first change is setting gather_facts: False, if left unset the first step of the playbook will be for Ansible to collect data about the playbook's running environment. The item we are interested in is the ansible_python_interpreter version that will be detected. Because the BitOps container is built with a python 3.8+ image embedded, this would default to python3 in normal circumstances which is incompatible with the ansible-st2 playbook at the moment, thus causing errors at certain points in running the playbook.
To adapt BitOps to an older application or one that requires older packages, all we have to do is pause the gather_facts function, and install the correct python version. After which gather facts will automatically pick up the python binary located at /usr/bin/python which is set in our extra-vars.json file shown earlier. We then resume normal startup procedures and manually trigger gather_facts using setup:.
Putting It Back Together
Phew! 😅
All of the moving pieces can be a lot to take in initially but truly we are not modifying the StackStorm playbook base we had before all that much. Most of the new information comes from the introduction of automatic instance creation and deployment through Terraform which is an extremely deep topic all on its own. However, you'll be happy to find out that executing deploying BitOps and our operations repo is not all too different from the previous article and deploying theansible-st2 playbook.
export AWS_ACCESS_KEY_ID=ABCDEF012345
export AWS_SECRET_ACCESS_KEY=8BuJW2LIlQaTvInalkq0Xzu5ogcf
export AWS_DEFAULT_REGION=us-west-1
export TF_STATE_BUCKET=st2-bitops-bucket
export ST2_GITHUB_TOKEN=wL/SK5g37dz6GqL07YEXKObR6
docker run \
-e ENVIRONMENT="st2-bitops-test" \
-e AWS_ACCESS_KEY_ID=$AWS_ACCESS_KEY_ID \
-e AWS_SECRET_ACCESS_KEY=$AWS_SECRET_ACCESS_KEY \
-e AWS_DEFAULT_REGION=$AWS_DEFAULT_REGION \
-e TF_STATE_BUCKET=$TF_STATE_BUCKET \
-e ST2_GITHUB_TOKEN=$ST2_GITHUB_TOKEN \
-v $(pwd):/opt/bitops_deployment \
bitovi/bitops:latest
Of specific interest we can see that our Ansible before-deploy scripts executed:
Checking before scripts (bitops.before-deploy.d)
Running Before Deploy Scripts
I am a before ansible lifecycle script!
+ echo 'I am a before ansible lifecycle script!'
+ python /tmp/tmp.pgdMkD/_scripts/ansible/wait-for-inventory-hosts.py
Running wait for host script:
Waiting for host: 14.52.251.2
BITOPS_CONFIG_COMMAND:        --extra-vars=@extra-vars.json
BITOPS_SCHEMA_ENV_FILE: export BITOPS_ANSIBLE_EXTRA_VARS='@extra-vars.json'
export BITOPS_ANSIBLE_DRYRUN='False'
Running Ansible Playbooks
Similar for our slight modifications to stackstorm.yaml to ensure python2 is installed before we execute the rest of the playbook:
+ ansible-playbook /tmp/tmp.JgEcBc/st2-bitops-test/ansible/stackstorm.yml --extra-vars=@extra-vars.json

PLAY [Install st2] *************************************************************

TASK [Install python for Ansible] **********************************************
ok: [14.52.251.2]

TASK [Gathering facts] *********************************************************
ok: [14.52.251.2]
Just like before, our custom pack list from extra-vars.json are installed while the playbook runs:
TASK [StackStorm.st2 : Install st2 packs] **************************************
changed: [14.52.251.2] => (item=st2)
changed: [14.52.251.2] => (item=https://dylan-bitovi:wL/SK5g37dz6GqL07YEXKObR6b@github.com/dylan-bitovi/my_st2_pack.git)
...
PLAY RECAP *********************************************************************
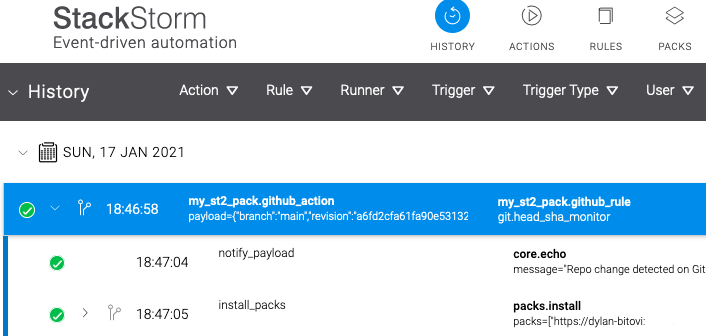
14.52.251.2 : ok=93 changed=53 unreachable=0 failed=0 skipped=80 rescued=0 ignored=3Navigating to our AWS instance's IP, we should be greeted with the StackStorm login window and able to authenticate with the same default username and password as before. We're also able to see that our custom pack continuous integration sensor is still functional, as there will be an immediate repo-sync:
Huzzah!💪
Teardown is just as easy. Simply pass in the -e TERRAFORM_DESTROY=true BitOps environmental variable with the container:
export AWS_ACCESS_KEY_ID=ABCDEF012345
export AWS_SECRET_ACCESS_KEY=8BuJW2LIlQaTvInalkq0Xzu5ogcf
export AWS_DEFAULT_REGION=us-west-1
export TF_STATE_BUCKET=st2-bitops-bucket
export ST2_GITHUB_TOKEN=wL/SK5g37dz6GqL07YEXKObR6
docker run \
-e ENVIRONMENT="st2-bitops-test" \
-e AWS_ACCESS_KEY_ID=$AWS_ACCESS_KEY_ID \
-e AWS_SECRET_ACCESS_KEY=$AWS_SECRET_ACCESS_KEY \
-e AWS_DEFAULT_REGION=$AWS_DEFAULT_REGION \
-e TF_STATE_BUCKET=$TF_STATE_BUCKET \
-e TERRAFORM_DESTROY=true \
-e ST2_GITHUB_TOKEN=$ST2_GITHUB_TOKEN \
-v $(pwd):/opt/bitops_deployment \
bitovi/bitops:latest
And as quickly as StackStorm arrived, it has now departed. 👋
What's Next?
Where does that leave our deployment? We now have a one-button complete deployment for StackStorm, but what can we do with it and BitOps? When we start to think about the next steps, we start to see the emerging power of BitOps.
We only have our one operations repo st2-bitops-test but what if there were additional environments that needed their own servers, custom st2 packs, and dependencies? Or consider how we continue moving towards even more rigorous Infrastructure-as-Code initiatives, and we now want to create separate servers for prod and dev. All we have to do is copy our operations repo to a new directory and execute BitOps targetting the new directory.
For StackStorm it may seem like overkill to go through such lengths for the ability to deploy a single server. However, most organizations can benefit from each business unit being able to readily deploy the same standardized technologies each with their own flavour to their environments. In non-StackStorm based applications, we've just shown how easy it is to take an application or service and port its entire structure into BitOps.
What will you deploy with BitOps next?
If you have further questions or suggestions, please reach out and become new members in the StackStorm Community Slack, or drop us a message at Bitovi!
Work With Us
We collaborate with development teams on deployment automation, resiliency, observability, and infrastructure migration and management. We’re happy to assist you at any time in your DevOps automation journey!
Click here to get a free consultation on how to tackle your biggest StackStorm problems.
Previous Post

Next Post